Is opening your closet door a little stressful? You’re not alone. Many of us are fighting a quiet battle with piles of clothes, mismatched shoes, and accessories we forgot we even owned.

That morning scramble to find the right shirt can set a frustrating tone for the whole day. It feels like no matter how much you tidy up, the chaos always finds a way to creep back in. But what if your closet could be a space of calm instead of clutter?
Getting your life in order can start with your wardrobe. We’ve gathered 45 brilliant organization systems to inspire you. From high-tech solutions to rustic DIY projects, there is a clever idea here for every budget and every style. It’s time to create a closet you love to open.
1. The Minimalist Zen Organizer

This closet is all about calm and simplicity. The design uses natural wood, a neutral color palette, and clean lines to create a peaceful, uncluttered space. Everything has its place, which makes getting ready in the morning feel less stressful.
The layout is open and airy, with a mix of shelves, drawers, and hanging space. A vertical LED light adds a soft glow, while a special bin for “one in, one out” encourages a mindful approach to shopping. It’s a system designed to bring a sense of order and tranquility to your daily routine.
DIY Guide: Create Your Own Zen Closet
You don’t need a custom-built closet to find your inner calm. Here’s how you can get this clean and simple look.
Step 1: The “One In, One Out” Bin Find a nice-looking basket or a simple white bin. Label it “One In, One Out.” Place it somewhere you can see it easily in your closet. Every time you buy a new piece of clothing, you have to put one old piece of clothing in the bin to donate. This is the most important step!
Step 2: Add Warm Lighting Go to a hardware store and buy a battery-powered, stick-on LED light strip. Look for one that has a “warm white” color. Stick it vertically on the inside wall of your closet. This will create a soft, gentle light that is much calmer than a harsh overhead bulb.
Step 3: Use Matching Hangers This is a simple trick that makes a huge difference. Get rid of all your mismatched plastic and wire hangers. Buy a set of simple wooden hangers. When all your hangers match, your closet will instantly look cleaner and more organized.
Step 4: Create a Jewelry Display Instead of a messy jewelry box, make a simple display. Get a small, plain picture frame and remove the glass and the back. You can stretch a piece of nice fabric, like linen, across the opening and secure it to the back. Now you can hang your necklaces and earrings on it.
Step 5: Fold and Stack Neatly For your shelves, learn how to fold your sweaters and t-shirts neatly so they are all the same size. Stack them in short, tidy piles. Leave a little bit of space between the piles so they don’t look crowded.
2. The Executive Walk-In Suite

This walk-in closet is the height of luxury and organization. It’s designed to feel like a high-end boutique, with dark wood, custom lighting, and a place for everything. This is a space for someone who appreciates fine details and wants their wardrobe to be a showpiece.
The centerpiece is a marble-topped island with drawers for accessories like ties and watches. Glass doors on the cabinets keep everything dust-free but still visible. A special pull-out drawer even has a built-in charging station for your devices. It’s a sophisticated system that combines classic style with modern convenience.
DIY Guide: Get the High-End Boutique Look on a Budget
You can give your closet this luxurious feel without spending a fortune.
Step 1: Create a Center “Island” You don’t need a custom marble island. Find a small, simple dresser or a narrow bookcase. Paint it a dark color, like charcoal gray or navy blue. Place it in the middle of your walk-in closet. You can even get a piece of marble-patterned contact paper to cover the top.
Step 2: Add Drawer Dividers Go to a container store or look online for velvet-lined drawer dividers. You can get inserts specifically designed for ties, watches, or jewelry. Placing these inside your drawers will instantly make them feel more luxurious and organized.
Step 3: The DIY Charging Station This is an easy tech upgrade. Buy a small, flat power strip with USB ports. Use strong, double-sided tape to mount it in the back of a drawer. Now you can drill a small hole in the back of the drawer to run the cord through. You have your own hidden charging station!
Step 4: Use Puck Lights To get that custom lighting look, buy a pack of battery-powered, stick-on “puck lights.” Place one on the “ceiling” inside each section of your closet. When you open the door, you can tap them on to highlight your clothes.
Step 5: Add a Touch of Metal Swap out the basic knobs on your closet doors and drawers. Go to a hardware store and find some elegant handles in a brushed gold or chrome finish. This is a small change that makes the whole space feel more expensive.
3. The Industrial Pipe & Plank Wardrobe

This open closet has a cool, urban, and slightly rugged feel. The entire system is built from industrial-style metal pipes and thick wooden planks. It’s a strong, practical design that is great for a loft apartment or a room with a modern, industrial vibe.
The open shelving makes it easy to see everything at once. There are hanging rods for shirts, shelves for folded clothes, and even special racks for shoes and boots. Wire baskets and vintage-style crates are used for extra storage. It’s a stylish and functional system that is built to last.
DIY Guide: Build Your Own Industrial-Chic Closet
This is a really fun DIY project that you can customize to fit your exact space.
Step 1: Gather Your Pipes Go to a big hardware store. You will find all the parts you need in the plumbing aisle. You’ll need several lengths of black or galvanized metal pipe, plus connector pieces like “flanges” (the flat, round parts that attach to the wall), “elbows” (for corners), and “tees” (for joining three pipes).
Step 2: Get Your Wood Planks Buy some thick, solid wood planks. Pine is a good, inexpensive choice. You can have the hardware store cut them to the lengths you need. For that rustic look, you can sand the wood and then apply a dark wood stain.
Step 3: Plan Your Design Draw a simple sketch of how you want your closet to look. Decide where the shelves will go and where you’ll have your hanging rods. This will help you figure out how many pipes and connectors you need to buy.
Step 4: Assemble the Frame Start by screwing all your pipes and connectors together to build the main frame of your closet system. It’s like building with a big, metal LEGO set!
Step 5: Mount and Secure This is a two-person job. With an adult’s help, hold your assembled pipe frame against the wall. Use a level to make sure it is straight. Then, use strong screws to attach the flanges to the wall. For extra safety, make sure you are screwing into the wall studs. Once the frame is secure, you can place your wooden planks on it to create your shelves.
4. The Smart Wardrobe of the Future

This closet is straight out of a science fiction movie. It’s a high-tech system designed to make getting dressed easier and more interactive. This is for the tech-lover who wants the latest and greatest in home automation.
The wardrobe features a rotating, automated clothing rack that brings your selection to you. But the star of the show is the smart mirror. It acts as a digital screen that can suggest outfits, show you the weather, and even connect to your phone. It’s a fully integrated system that is the ultimate in modern convenience.
DIY Guide: Create Your Own “Smart” Closet
You don’t need a robot to make your closet smarter. Here’s how you can use today’s tech to upgrade your morning routine.
Step 1: The Tablet “Smart Mirror” The easiest way to get a smart mirror is to use a tablet you already have. Find an old tablet and mount it on the wall or the back of your closet door. You can install a simple home screen app that shows the date, time, and weather at a glance.
Step 2: Get a Digital Lookbook App There are apps that let you take pictures of all your clothes and create a digital catalog of your wardrobe. You can use this app on your new “smart mirror” tablet to plan your outfits without having to pull everything out.
Step 3: Use a Motorized Tie Rack To get a little bit of that automation magic, buy a small, battery-powered rotating tie or belt rack. They are inexpensive and can be easily mounted to your closet wall. With the press of a button, you can have your accessories parade in front of you.
Step 4: Install Smart Lighting Go to a hardware store and buy a “smart” light bulb. These bulbs can connect to your home’s Wi-Fi. You can program it to turn on automatically when you open your closet door in the morning or even change its color using an app on your phone.
Step 5: The “What to Wear?” Spinner This is a fun, low-tech trick. Get a simple “prize wheel” or “spinner” from a toy store. In each section, write a different type of outfit, like “Casual,” “Sporty,” or “Dressy.” When you can’t decide what to wear, just give it a spin!
5. The Scandinavian Modular System

This closet has a clean, bright, and airy feel, which is very common in Scandinavian design. The system is modular, which means it’s made of different pieces that you can arrange in any way you like. It’s a flexible and stylish solution that can grow and change with your needs.
The design uses a simple palette of white metal and light-colored wood. A pegboard wall is a clever feature for hanging hats, bags, and scarves. Open shelves, drawers, and baskets provide a variety of storage options. It’s a beautiful and practical system that is all about simplicity and functionality.
DIY Guide: Create Your Own Scandi-Style Closet
You can get this fresh, modern look by focusing on simple materials and smart organization.
Step 1: The Pegboard Wall A pegboard is a key part of this look. Go to a hardware store and buy a large pegboard. You can leave it in its natural brown color or paint it white. With an adult’s help, mount it on a wall in your closet. Don’t forget to use spacers behind it so the hooks will fit.
Step 2: Use Simple Shelving Look for a simple, modular shelving system. A system with white metal uprights and light wood shelves would be a great choice. The great thing about these systems is that you can adjust the height of the shelves whenever you want.
Step 3: Get Leather-Pull Drawers To get that special Scandinavian touch, you can upgrade your drawer handles. If you have a simple wooden dresser, you can replace the knobs with pulls made from a strip of leather. You can buy these online or make them yourself from an old belt.
Step 4: Use Coordinated Bins For your shelves, get a set of matching storage bins. Simple, gray felt bins are a great choice for this style. Use them to store loose items and keep your shelves looking neat and tidy.
Step 5: Keep It Simple The most important rule of Scandinavian design is not to have too much stuff. Try to keep your surfaces clear and uncluttered. Only display a few of your favorite things. Less is more!
6. The Library Ladder Loft Closet

This closet is a brilliant solution for a room with very high ceilings. It takes advantage of all that vertical space by building the storage all the way up to the top. The rolling library ladder is the star of the show, making it easy and fun to reach the highest shelves.
The design features a mix of open hanging rods, drawers, and high shelves for storing out-of-season items or luggage. Cabinets at the very top have flip-up doors, which are easier to manage from a ladder. Backlit shelves add a warm, high-end glow to the whole setup.
DIY Guide: Build a “Faux” High-Storage Closet
You can get this grand, library-like feel, even with normal-height ceilings.
Step 1: Go Vertical The key to this look is using the full height of your wall. Buy the tallest, skinniest bookcases or shelving units you can find. Place them on either side of your closet opening to create a “built-in” look that draws the eye upward.
Step 2: The Decorative Ladder You don’t need a real, expensive rolling ladder. Find a beautiful wooden “blanket ladder” at a home decor store. These are tall, skinny ladders that are meant to be leaned against a wall to display blankets. Just lean it against your shelving for that library look. It’s for decoration, not for climbing!
Step 3: Use High-Up Baskets On the very top shelves of your new tall units, place a row of matching, attractive baskets or boxes. Since this is your “loft” storage, you can fill them with things you don’t need to access very often, like old photo albums or winter sweaters in the summer.
Step 4: Install Backlighting This is a simple trick that looks very fancy. Buy some battery-powered, stick-on LED light strips. Run them along the back edge of your shelves. The soft glow will shine out from behind your clothes and baskets, making the whole closet feel more luxurious.
Step 5: Add a Pull Rod To help you reach things up high without a ladder, get a closet “pull rod” or “valet hook.” It’s a long pole with a hook on the end that is designed to help you grab hangers from high rods.
7. The Playful Kids’ Command Center

This closet is designed to be a fun and functional space that helps kids learn to be independent. It’s more than just a place for clothes; it’s a command center for their entire day, from getting dressed to doing homework.
The system uses a variety of storage solutions at a kid-friendly height. Colorful bins and drawers are labeled with pictures or simple words. There are hanging rods for both everyday clothes and dress-up costumes. A small desk area with a stool and a place for books and art supplies makes it a multi-purpose space.
DIY Guide: Create a Kid-Friendly Closet Hub
You can make any closet more fun and accessible for your little one.
Step 1: Lower the Rod One of the best things you can do is make it so your child can reach their own clothes. With an adult’s help, install a second closet rod lower down in the closet. Now they can hang up their own shirts and jackets.
Step 2: Use Picture Labels For younger kids who can’t read yet, picture labels are a game-changer. Take a photo of the items that go in each drawer (a photo of socks, a photo of t-shirts, etc.). Print the photos and tape them to the front of the correct drawers.
Step 3: Colorful Bins are Your Friend Kids love color. Go to a dollar store and get a bunch of colorful plastic bins. Use them on lower shelves to store toys, shoes, and art supplies. Assigning a color to a category (e.g., “blue for LEGOs,” “red for cars”) can make cleanup time easier.
Step 4: Create a “Backpack Zone” Install a few strong, sturdy hooks on the wall, low enough for your child to reach. This is the official “Backpack Zone.” It’s where their school bag and jacket go as soon as they get home. No more searching for it in the morning!
Step 5: Add a Step Stool A small, sturdy step stool is a must-have. It helps kids reach things on slightly higher shelves and makes them feel more independent and in control of their own space.
8. The Hollywood Glam Vanity Closet

This closet is pure glamour and luxury. It’s designed to feel like the private dressing room of a classic Hollywood movie star. The space is bright, sparkling, and perfectly organized for a large collection of clothes, accessories, and beauty products.
The centerpiece is a large vanity with a lighted mirror, perfect for doing hair and makeup. Glass doors on the cabinets and clear-topped drawers show off the beautiful things inside. A stunning chandelier adds a touch of sparkle, while a built-in mini-fridge is for keeping drinks and beauty products cool.
DIY Guide: Create Your Own Glamorous Dressing Room
You can add this movie-star sparkle to your closet with a few simple and fun DIYs.
Step 1: The Hollywood Mirror You don’t need a whole new vanity. You can give any mirror a Hollywood makeover. Buy a set of stick-on vanity lights. These are individual LED bulbs on a wire that you can stick directly onto the surface of your mirror. It will give you that bright, beautiful light.
Step 2: Add Some Sparkle Look for anything that sparkles. You can find beautiful crystal-style knobs for your drawers at a hardware store. Use mirrored trays to organize your makeup and perfume. You can even find self-adhesive “crystal” trim at a craft store to add a little bling to the edge of your shelves.
Step 3: See-Through Storage Part of the glam look is showing off your beautiful things. Go to a container store and get some clear acrylic organizers for your makeup and jewelry. For your drawers, find shallow trays with lots of small compartments to keep your sunglasses and accessories neatly arranged.
Step 4: The Mini “Beauty” Fridge This is a fun, luxurious touch. You can buy a very small, chic-looking mini-fridge online. They are often marketed as “skincare fridges.” Use it to keep your face creams, masks, and even a bottle of sparkling water cool.
Step 5: Find a Plush Seat You need a glamorous place to sit. Look for a small stool or bench with a soft, luxurious top. A small stool with a white, faux-fur top or a tufted velvet bench would be a wonderful final touch for your Hollywood dressing room.
9. The Ultimate Gear Garage Organizer

This system is designed for the adventurer, the athlete, or the avid hobbyist. It takes the idea of a closet and moves it into the garage, creating a tough, organized hub for all your gear. This is for someone whose wardrobe includes more helmets and hiking boots than suits and ties.
The system is built from heavy-duty metal shelving and grid walls, which are strong enough to hold heavy equipment. There are special hooks for hanging tools, racks for skis or snowboards, and ventilated shelves for muddy boots. It’s a highly practical and durable system that can handle anything you throw at it.
DIY Guide: Build Your Own Garage Gear Locker
You can turn a messy corner of your garage into an organized command center for your adventures.
Step 1: Start with a Strong Foundation Go to a hardware store and buy a heavy-duty metal shelving unit. These are often sold for garage or workshop use and are very strong and easy to assemble. This will be the backbone of your system.
Step 2: Install a Grid Wall A grid wall or a slat wall is a great way to organize smaller items. You can buy panels of this at most big hardware stores. Mount a panel on the wall next to your shelving unit. Now you can use a variety of hooks, baskets, and clips to hang your gloves, hats, and tools.
Step 3: Create a Boot Rack To deal with wet or muddy boots, create a special drying rack. Get a simple wooden shelf. Drill several large holes in it and insert short lengths of thick wooden dowels, pointing upwards. You can place your boots upside down on these pegs to help them dry and keep their shape.
Step 4: Use Labeled Bins For smaller items, use sturdy, clear plastic bins with lids. This will keep them protected from dust and moisture. Use a label maker to clearly mark what’s inside each bin (e.g., “Bike Gear,” “Camping Supplies”).
Step 5: Add a Workbench Surface Leave one of the shelves in your metal unit empty at about waist height. Get a thick piece of plywood and place it on the shelf. This creates a small, durable workbench where you can do repairs or tune up your equipment.
10. The Floating Acrylic Wardrobe

This closet has a super modern, almost futuristic look. The shelves and drawers are made from clear acrylic, which makes them look like they are floating in mid-air. It’s a great design for a small space because the clear material doesn’t feel heavy or bulky.
The system uses a combination of hanging rods and clear, see-through drawers and shelves. This makes it incredibly easy to find what you’re looking for, since you can see the contents of every drawer at a glance. It’s a sleek, minimalist design that is both highly functional and visually stunning.
DIY Guide: Get the “Floating” See-Through Look
You can get this light, airy, and modern look with some clever shopping and simple DIYs.
Step 1: The Clear Drawer Unit The easiest way to start is to buy a drawer unit made from clear plastic. You can often find these at an office supply store, sold as paper or craft organizers. A tall, skinny one can be placed in your closet to hold all your folded clothes.
Step 2: Install Acrylic Shelves Go to a hardware store or look online for clear acrylic shelves. These are often sold for bathrooms, but they work great in a closet. Instead of using clunky brackets, look for ones that mount with simple, clean-looking metal clips to enhance the “floating” look.
Step 3: Use Acrylic Risers On your new clear shelves, use clear acrylic “risers” or display stands. These are like little tables that you can use to create multiple levels on a single shelf. You can put your shoes on top and slide your sandals underneath, for example.
Step 4: See-Through Accessory Holders Lean into the clear theme for all your accessories. Get clear acrylic holders for your makeup brushes, jewelry, and sunglasses. The more clear items you use, the more cohesive and intentional the whole design will look.
Step 5: The Floating Hanging Rod This is a great final touch. Instead of a normal closet rod, you can create one that looks like it’s floating. You will need a metal pipe or a wooden dowel. Instead of mounting it with brackets on the side walls, you can hang it from the ceiling using strong, clear fishing line or thin metal cables.
11. The Adjustable Grid System

This closet system is the ultimate in flexibility. It’s built around a floor-to-ceiling pole and rail system that lets you move and rearrange every component. This is for someone who loves to re-organize and wants a closet that can adapt to their changing wardrobe.
The system features a wide variety of components: drawers, shelves, baskets, and hanging rods. All of these can be clipped onto the vertical poles at any height. You can change the entire layout in an afternoon without any tools. It’s a highly practical and customizable solution for a modern space.
DIY Guide: Create a Super-Flexible Closet
You can get this amazing adjustability by using a track-based shelving system.
Step 1: Install the Tracks Go to a hardware store and buy a “twin track” or “wall-mounted shelving” system. This system starts with long metal tracks that you screw vertically onto the wall. Make sure they are perfectly straight and securely attached to the wall studs.
Step 2: Add the Brackets Once the tracks are up, you can click special metal brackets into the slots on the tracks. The best part is that you can move these brackets up or down at any time to change the height of your shelves.
Step 3: Add Shelves and More Place wooden or wire shelves on top of the brackets. But you’re not limited to shelves! Many of these systems also have special attachments like wire baskets and even hanging rods that can clip right onto the tracks.
Step 4: Use Add-On Organizers To get even more flexibility, look for organizers that are designed to hang from your new shelves or rods. You can get hanging canvas shelves for sweaters, or small baskets that clip onto the underside of a wire shelf.
Step 5: Label Your Zones Since it’s so easy to move things around, it’s a good idea to use simple, non-permanent labels. You can use small, clip-on bin labels or even a dry-erase marker on some surfaces. This way, when you rearrange your closet, you can easily re-label it too.
12. The Bohemian Rattan Wardrobe

This closet area has a warm, relaxed, and natural vibe. The style is all about texture and natural materials, especially the beautiful woven rattan. It’s for someone who loves a handcrafted, bohemian look that feels both stylish and down-to-earth.
The main pieces are a wooden wardrobe and drawers with rattan-paneled fronts. Open, built-in nooks are used to display favorite accessories. A macrame wall hanging and wooden hooks add extra storage and a handmade touch. The overall feeling is cozy, personal, and effortlessly chic.
DIY Guide: Get the Boho-Chic Rattan Look
You can give any plain piece of furniture this trendy, natural makeover.
Step 1: Find a Simple Dresser Start with a basic, inexpensive wooden dresser. A simple one with flat-fronted drawers is the easiest to work with.
Step 2: Get Your Rattan Go to a craft store or look online for a roll of “cane webbing” or “rattan webbing.” This is the woven material you’ll use for the front of your drawers. You will also need a staple gun and some strong scissors or shears.
Step 3: Cut the Webbing Carefully remove the drawers from your dresser. Measure the front panel of one drawer. Cut a piece of your cane webbing that is slightly larger than the drawer front. It’s always better to cut it a little too big and trim it later.
Step 4: Attach the Rattan Lay your piece of cane webbing on a flat surface. Place the drawer face-down on top of it. Carefully pull the webbing tight and use a staple gun to staple it to the back or inside edges of the drawer front. Work your way all around the drawer, pulling the webbing taut as you go.
Step 5: Add Natural Accessories To complete the look, add other natural and handmade items. Get some simple, round wooden knobs for your new rattan drawers. Hang a macrame plant hanger from the ceiling or a woven wall hanging on the wall. Use wicker baskets for storage.
13. The Classic Gentleman’s Closet

This walk-in closet is a masterclass in classic, masculine style. The rich, dark wood and meticulous organization create a space that is both sophisticated and highly functional. It’s designed to feel like a traditional tailor’s shop.
Every detail is considered. There are special pull-out racks for ties and belts, and angled shelves for shoes. Drawers have custom dividers for watches and cufflinks. A glass-topped drawer displays the most prized accessories. It is a timeless and elegant space for the modern gentleman.
DIY Guide: Create a Dapper and Organized Closet
You can get this sharp, organized look with a focus on details and the right accessories.
Step 1: The Wood-Grain Makeover If you don’t have dark wood closets, you can fake it. Buy some high-quality, dark wood-grain peel-and-stick wallpaper. Carefully apply it to the inside walls of your closet. This will instantly create that rich, classic backdrop.
Step 2: Install Specialty Racks The key to this look is specialized storage. Go to a hardware store or look online for pull-out racks designed for ties, belts, and trousers. These are easy to install on the inside wall of your closet and make a huge difference in organization.
Step 3: DIY Valet Tray Find a beautiful wooden tray. You can line the bottom of it with a piece of felt or velvet. Place this on top of a dresser or a shelf. This is your new “valet tray,” a designated spot to empty your pockets and place your watch and keys at the end of the day.
Step 4: Create a “Display” Drawer Pick one drawer to be your showcase drawer. Buy a custom-sized piece of plexiglass to fit inside the top edges of the drawer, creating a “lid.” Inside the drawer, use velvet-lined dividers for your watches and cufflinks. It’s a simple way to create a high-end look.
Step 5: Use Matching Wooden Hangers This is a must for this style. Invest in a set of high-quality wooden suit hangers. Look for ones that have a trouser bar. Using consistent, high-quality hangers for all your shirts, suits, and pants will make the whole closet look more polished and professional.
14. The Urban Wire Grid System

This closet system has a cool, industrial, and slightly edgy vibe. It’s built using a black wire grid wall, which is incredibly versatile and great for a modern, urban space. The open design allows you to see everything at once and change the layout easily.
The system uses a mix of wire baskets, wooden shelves, and hanging rods that can all be hooked onto the grid in any configuration. It’s a lightweight, airy system that doesn’t feel bulky. This is a great solution for someone who wants a flexible, modern, and budget-friendly open closet.
DIY Guide: Build Your Own Grid Wall Wardrobe
This is a really easy and fun project that you can completely customize.
Step 1: Get Your Grids The main component is the wire grid panels. You can often find these at store fixture supply shops or online. They come in large rectangular panels. You will also need the special wall-mounting clips to attach them to your wall.
Step 2: Mount the Panels With an adult’s help, hold the grid panels against the wall where you want your closet to be. Use a level to make sure they are straight. Then, use the mounting clips and screws to securely attach the panels to the wall. Make sure you are screwing into the wall studs for strength.
Step 3: Add Baskets and Hooks Now for the fun part! Buy a variety of accessories that are designed to hook onto a grid wall. You can get baskets in all shapes and sizes, hooks, and even special brackets for shelves.
Step 4: Create Your Shelves To create shelves, attach two shelf brackets to the grid wall. Then, just place a simple wooden plank on top of them. You can move these shelves up or down whenever you want a different look.
Step 5: Add Hanging Rods You can also find special brackets that are designed to hold a closet rod. Attach two of these brackets to your grid wall and place a simple metal or wooden rod between them. You now have a completely flexible and stylish open wardrobe.
15. The Color-Block Cubby Closet

This closet is all about fun, bold color, and playful organization. The design uses a simple grid of cubbies, with some of the boxes painted in bright, primary colors. It’s a cheerful and modern look that is great for a kid’s room or for anyone who loves a pop of color.
The system is very simple and effective. The colorful open cubbies are used for folded clothes, while hanging rods provide space for shirts and jackets. Drawers and doors in contrasting colors add to the blocky, geometric look. It’s a creative design that turns a simple storage unit into a vibrant piece of art.
DIY Guide: Create Your Own Color-Block Masterpiece
You can give any plain white shelving unit this fun and modern makeover.
Step 1: Start with a White Cubby Shelf The easiest way to start is with a simple white cubby-style bookshelf. A nine-cube or a sixteen-cube unit is a great choice. Assemble it according to the instructions.
Step 2: Pick Your Colors Choose three or four bold, bright colors. Red, yellow, and blue are a classic choice. Go to a paint store and get small sample pots of these colors.
Step 3: Paint the “Back” of the Cubbies This is a clever trick to get the look without painting the whole unit. Instead of painting the inside of the cubes, you are going to paint thin pieces of cardboard or foam board. Cut the board to fit the back wall of each cubby you want to color. Paint your squares and let them dry. Then, you can just slide them into the back of the cubbies.
Step 4: Customize Your Bins and Doors If your shelving unit has fabric bins or doors, you can customize those too. You can paint the front of the drawers with your new colors. For fabric bins, you can use fabric paint to give them a pop of color.
Step 5: Mix and Match Arrange your new colorful inserts and bins in a fun, random pattern within your white grid. The contrast between the bright colors and the clean white frame is what makes this design look so great.
16. The Minimalist Floating Wardrobe

This closet system is the definition of clean, airy, and minimalist design. The drawers and shelves are mounted directly to the wall, which makes them look like they are floating. This creates a very open and uncluttered feeling, which is great for a modern bedroom.
The design uses a simple, all-white color palette, which adds to the light and spacious feel. A central bench provides a place to sit and also has shoe storage underneath. The clean lines and lack of visible supports make this a highly sophisticated and elegant storage solution.
DIY Guide: Get the “Floating” Furniture Look
You can get this sleek, modern look using special hardware and a clean color palette.
Step 1: Choose a Crisp White The key to this look is a clean, uniform color. Paint the wall where your closet will be a bright, fresh white. Then, make sure all the furniture pieces you use are also a matching shade of white.
Step 2: Get “Floating” Drawer Units You don’t need to build them from scratch. Many furniture stores sell “wall-mounted” or “floating” drawer units and shelves. These come with special brackets and hardware that allow you to hang them securely on the wall.
Step 3: Use a Simple Bench Find a simple, modern bench with clean lines and thin metal legs. A white or light gray bench will work best. Place this between your two floating drawer units. You can then add a simple, low shoe rack underneath it.
Step 4: The Floating Rod To make your hanging rod look like it’s floating, you can use special ceiling-mounted brackets. Instead of being supported from the sides, the rod is hung from the ceiling on thin wires or metal posts. This adds to the open and airy feel.
Step 5: Keep It Clutter-Free This style only works if you keep it tidy. Use the drawers and boxes to hide away all your small, messy items. For the things that are on display, like your hanging clothes, try to keep them neat and color-coordinated.
17. The All-in-One Wardrobe Hub

This wardrobe is a complete, self-contained solution for clothing storage. It’s a single, large piece of furniture that has a specific place for every type of clothing. It’s a great choice for a room that doesn’t have a built-in closet.
The design is incredibly efficient. It features hanging rods at two different heights for both long and short garments. A central column of shelves is perfect for folded sweaters and t-shirts, while bins at the bottom can be used for shoes or accessories. Mirrored doors are a smart, space-saving addition.
DIY Guide: Maximize a Standard Wardrobe
You can take any basic wardrobe and turn it into a super-organized, all-in-one hub.
Step 1: Add a Second Hanging Rod Most wardrobes only come with one hanging rod. You can instantly double your hanging space by adding a second one. Buy a simple closet rod and brackets from a hardware store. Install it in the bottom half of the wardrobe to create a space for shirts and pants.
Step 2: Install a “Shelf Tower” Go to a home goods store and look for a narrow, stackable shelving unit. You can often find these in plastic or wire. Build this unit inside one side of your wardrobe to create a “tower” of shelves for all your folded clothes.
Step 3: Use the Doors Don’t forget about the storage potential of the inside of the doors! You can install small hooks for belts and scarves. You can also mount a lightweight, full-length mirror to the inside of one of the doors.
Step 4: Light It Up Wardrobes can be dark inside. Buy a battery-powered, motion-sensor LED light. You can stick this to the “ceiling” on the inside of the wardrobe. It will turn on automatically whenever you open the doors.
Step 5: Use Bins at the Bottom The floor of a wardrobe can often become a messy pile. Get two or three matching bins or baskets. Place them on the floor of the wardrobe. Use them to store your shoes, gym clothes, or anything else that doesn’t have a designated spot.
18. The “Cloffice” Work-and-Wear Station

This is a brilliant, space-saving idea that combines a closet and a home office into one compact unit. It’s a “cloffice” (closet + office), a perfect solution for a small apartment or a guest room.
The design cleverly integrates a small desk and shelving for books and supplies right next to the wardrobe space. There is still plenty of room for hanging clothes and drawers for folded items. Built-in lighting for the desk area makes it a functional workspace. It’s a smart and stylish way to make one room do the work of two.
DIY Guide: Build Your Own Cloffice Nook
You can carve out a small workspace in your own closet with this clever project.
Step 1: Make Some Space First, you need to clear out a section of your closet. You may need to remove a small set of drawers or a low hanging rod to create an open space for your new desk.
Step 2: Install Your “Desktop” Go to a hardware store and have them cut a sturdy piece of wood or MDF to the width of your cleared-out space. This will be your desktop. You can support it with simple wooden battens screwed into the walls of the closet on either side.
Step 3: Add Shelving Above Install one or two simple shelves on the wall above your new desktop. This will be the “office” part of your cloffice. Use it to store your notebooks, pens, and maybe a small plant.
Step 4: Light Up Your Workspace It can be dark inside a closet. Buy a small, stick-on, battery-powered LED under-cabinet light. Stick this to the underside of the shelf that is directly above your desk. This will shine a nice, bright light down onto your work area.
Step 5: Find a Tuck-Away Chair To save space, you’ll need a chair that you can easily move out of the way. Look for a small, armless chair or a folding chair that you can tuck under the desk or store in another part of the closet when you’re not using it.
19. The Under-the-Stairs Hideaway

This closet is a genius use of a space that is often wasted: the awkward, angled area under a staircase. This custom-built solution turns that tricky spot into a fully functional and beautifully organized closet.
The design uses every inch of the space. The angled ceiling is fitted with custom-cut hanging rods. A mix of shelves, drawers, and pull-out wire baskets provides a variety of storage options. Hooks on the outside are perfect for hanging coats or bags. It’s a brilliant example of smart design turning a problem area into a storage powerhouse.
DIY Guide: Organize an Awkward Angled Space
You don’t need a custom carpenter to make a sloped-ceiling closet work for you.
Step 1: Use Modular Cubes The best way to deal with a weird angle is with modular storage cubes. You can buy these as individual boxes and stack them up to fit the space. You can create a “stair-step” shape that fits perfectly under the slope of the ceiling.
Step 2: Get Angled Brackets To install a hanging rod under a slope, you need special hardware. Look online for “angled” or “adjustable” closet rod brackets. These allow you to attach a rod to a ceiling that isn’t flat.
Step 3: Use the Tallest Space for Long Clothes In the part of the closet that has the most vertical height, install a hanging rod for your longest items, like dresses and coats.
Step 4: Use the Shortest Space for Shoes In the lowest, most awkward part of the closet, place low shelves or shoe racks. This is a great spot to line up all your shoes.
Step 5: Add Pull-Out Baskets For the deeper parts of the closet that are hard to reach, install some pull-out wire baskets. You can fill these with items you don’t use every day. The pull-out feature means you won’t have to crawl into the back of the closet to find what you’re looking for.
20. The Copper & Onyx Display

This open closet is a bold and glamorous fashion statement. The design uses a dramatic combination of copper pipes, a dark black wall, and clean white shelves. It’s for someone who wants to display their wardrobe like it’s a collection in an art gallery.
The system is built around the stunning copper pipes, which are used for the main structure and for the hanging rods. White “floating” shelves and lit-up display boxes are used to highlight special shoes and handbags. It’s a highly curated and stylish look that is both edgy and elegant.
DIY Guide: Create a Chic Copper Pipe Wardrobe
You can get this high-fashion look with a trip to the hardware store and some creativity.
Step 1: Paint a Dramatic Accent Wall The first step is to create the right backdrop. Choose a wall and paint it a dark, dramatic color. A deep charcoal gray or a matte black will make the copper and your clothes really pop.
Step 2: Build with Copper Pipes Go to the plumbing aisle of a hardware store. Instead of iron pipes, this time you’re going to get copper pipes and fittings. You will need to clean and polish them to make them really shine. Assemble them to create your hanging rods and the main supports for your shelves.
Step 3: Add “Floating” Shelves To get that clean, floating look, use special “floating shelf” hardware. These are metal brackets that are hidden inside the shelf, so you can’t see how they are attached. Use thick, clean white shelves for a sharp contrast against your dark wall.
Step 4: Create a “Light Box” This is a great trick to highlight a favorite item. Take a simple, white wooden box or a cubby shelf. Install a small, battery-powered puck light on the inside “ceiling” of the box. Now you can display your best handbag or a pair of shoes in their own special spotlight.
Step 5: Curate Your Display This look is all about showing off your best pieces. Don’t overcrowd the rack. Choose a color palette for the clothes you want to display. Hang your most beautiful coats and shirts. Place your best shoes on the shelves. Think of it as creating a work of art.
21. The Fitness Locker Station

This setup is for the active person who has a lot of gear. It turns a closet into a personal locker room, with dedicated zones for different activities. Everything you need for a workout is organized and ready to go.
Open cubbies labeled “Running” and “Yoga” keep specific outfits together. Wire baskets allow sweaty clothes to air out, while smaller bins are used for socks and accessories. There’s even a built-in charging station for headphones and fitness trackers. It’s a highly functional system that makes it easy to grab your gear and go.
DIY Guide: Create Your Own Fitness Hub
Get your workout gear in order with this simple, sporty setup.
Step 1: Get Locker-Style Furniture The easiest way to start is with a metal locker or a simple white cabinet. You can often find used lockers online, or buy a new metal cabinet from a hardware store. This will give you the right athletic vibe.
Step 2: Create Activity Cubbies Inside your cabinet, add some shelves. Then, get some stencils and paint to label each shelf with your main activities, like “Running,” “Cycling,” or “Gym.” This helps you keep your different sets of gear separate.
Step 3: Use Wire Baskets Wire baskets are great for workout gear because they let air flow through. Install some sliding wire baskets in the bottom half of your cabinet. Use them for storing things like resistance bands, towels, and shoes.
Step 4: Label Everything Get a simple label maker or use a marker and some masking tape. Create labels for smaller bins to sort your socks, headbands, and other small accessories. The more you label, the easier it is to find things in a hurry.
Step 5: Install a Charging Station This is a great feature. Buy a small power strip with USB ports. With an adult’s help, drill a hole in the back of your cabinet. Feed the cord through the hole and plug it in. Now you can mount the power strip inside to charge all your gadgets.
22. The Globetrotter’s Getaway Hub

This closet is designed for the frequent traveler. It’s a dedicated command center for packing and preparing for your next trip. All your travel essentials are in one organized place, making packing less of a chore.
The setup features designated spots for luggage, backpacks, and travel bags. Shelves are filled with packing cubes, toiletries, and travel gadgets. A built-in power station keeps your electronics charged, and a checklist on the door ensures you never forget your passport. It’s an incredibly practical system for anyone who is always planning their next adventure.
DIY Guide: Build Your Own Travel Prep Station
Turn any small closet or cabinet into a hub that makes packing for trips a breeze.
Step 1: Make Space for Luggage The first step is to clear out the bottom of the closet. This will be the “parking garage” for your suitcases. Measure your luggage to make sure you leave enough room.
Step 2: Install a “Gadget Bar” Buy a wall-mounted power strip that has both regular outlets and USB ports. Mount this on the back wall of the closet. Now you have a dedicated spot to charge your power banks, travel adapters, and other electronics before a trip.
Step 3: Create a Checklist Board Get a small, inexpensive whiteboard or corkboard. Hang it on the inside of the closet door. Use a dry-erase marker to write a permanent packing checklist of essential items like “Passport,” “Phone Charger,” and “Toothbrush.”
Step 4: Use Clear Bins Go to a dollar store and get several clear plastic shoebox-sized bins. Use these to sort your travel-sized toiletries. Create a bin for “First Aid,” “Liquids,” and “Electronics.” Because they’re clear, you can see what’s inside at a glance.
Step 5: Add Door Storage Buy a hanging fabric shoe organizer. Instead of shoes, use the pockets to store things like travel documents, maps, currency from different countries, and travel guidebooks.
23. The Connoisseur’s Collection Vault

This is more than a closet; it’s a secure vault for valuable collections. The design uses rich, dark wood and custom lighting to create a space that feels like a private museum. It’s built to protect and display prized possessions.
Glass doors keep dust away while allowing you to see your finest garments. The standout features are the special, high-tech additions. A drawer with a temperature-controlled environment is for delicate items, while a biometric safe keeps jewelry secure. There are even automatic watch winders to ensure your timepieces are always ready to wear. This is the ultimate in luxury and security.
DIY Guide: Create a High-End Display Closet
You can give your closet this exclusive, secure feeling without the high-tech price tag.
Step 1: Set the Mood with Lighting The most important part of this look is the lighting. Install battery-powered, motion-sensor LED strips inside your closet. Place them so they shine down on your clothes. The warm light will make the space feel rich and exclusive.
Step 2: The Look of Glass Doors If you don’t have glass doors, you can fake the look. Buy some simple wooden frames from a craft store. Have a hardware store cut thin sheets of plexiglass to fit inside the frames. You can then attach these frames to the front of your shelves to give the illusion of glass cabinets.
Step 3: Secure Your Valuables You don’t need a giant biometric safe. Buy a small, personal lockbox or safe. You can place this on a shelf or even bolt it to the floor in the bottom of your closet for extra security. Use it to store your most important items.
Step 4: A Home for Your Watches Instead of expensive automatic winders, get a high-quality watch display box. These have a glass top and soft pillows to hold your watches. Placing this in a special, well-lit spot on a shelf will make your collection look important.
Step 5: Add a Touch of Cedar Cedar wood not only smells great but it also protects clothes. Buy some cedar blocks or cedar drawer liners. Place them in your drawers and on your shelves. It’s a classic touch that adds a sense of quality.
24. The Automated Carousel Closet

This closet brings the convenience of a dry cleaner’s rack right into your home. It features a motorized, multi-level carousel that rotates with the touch of a button. This system makes it incredibly easy to find any item of clothing.
The rotating rack makes great use of corner spaces, which are often hard to organize. With a simple remote control, you can bring any section of your wardrobe to the front. No more reaching into dark corners or forgetting about clothes you can’t see. It’s a high-tech solution for someone who wants the ultimate in convenience and organization.
DIY Guide: Make a “Manual” Carousel Closet
While a motorized rack is a big project, you can get the same easy-access benefits with some simple hardware store items.
Step 1: The Super-Powered Lazy Susan The corner is the key. Go to a hardware store and buy the largest, strongest lazy Susan hardware you can find. This is the spinning metal part that goes between two surfaces.
Step 2: Build Your Spinning Discs You will need two or three round discs of plywood. The size will depend on your closet corner. An adult will need to help you cut these circles with a jigsaw.
Step 3: Assemble the Carousel Attach your lazy Susan hardware to the center of your first plywood disc. Then, attach a central pole (a thick wooden dowel or a metal pipe) to the top of the hardware. Add your second disc higher up on the pole, and so on. You’ve just built a spinning tower!
Step 4: Create Hanging Spokes Now you need a place to hang clothes. On your top spinning disc, screw in several strong, long hooks around the edge, pointing outwards. These will act like spokes on a wheel. You can hang your clothes hangers on these hooks.
Step 5: Place and Use Put your new manual carousel in the corner of your closet. Now you can spin it by hand to bring any item to the front. It gives you the same 360-degree access without needing any electricity.
25. The Slide-Out Storage Towers

This closet system is a genius solution for narrow, deep spaces. Instead of one big closet, it’s made of several tall, skinny cabinets that slide out like a pantry. This allows you to use every inch of a deep space without losing things at the back.
Each pull-out tower is filled with shelves and angled bins. When you slide a unit out, you can see and reach everything inside from the side. It’s a clean and incredibly efficient way to organize folded clothes, shoes, and accessories. This is a great design for making a small space feel much bigger.
DIY Guide: Build Your Own Rolling Storage Tower
This is a fun project that is like building a tall box on wheels.
Step 1: Measure Your Space First, decide where your slide-out tower will go. It could be in a narrow gap next to a wardrobe. Measure the height, width, and depth of the space very carefully.
Step 2: Build the Box Go to a hardware store and get some thin plywood or MDF boards. You will need five pieces to build your tower: a back, two sides, a top, and a bottom. You will be building a tall, skinny box with an open front. Screw the pieces together with an adult’s help.
Step 3: Add Wheels Turn your new box on its back. Attach four small caster wheels to the bottom piece, one at each corner. Make sure two of them can swivel to make it easy to pull out. Now your tower can roll!
Step 4: Install Shelves Stand your tower up. Now you can install shelves inside. Measure and cut more boards to fit inside your box. You can support them with small wooden battens or shelf pins. You can decide how much space you want between each shelf.
Step 5: Add a Handle and a Face You can add a front panel to your tower to make it look like a real cabinet. Cut one more piece of wood and attach it to the front of the box. Add a nice handle. Now you can slide your new storage tower into its spot and pull it out whenever you need something.
26. The Family Laundry & Wardrobe Command Center

This room is the ultimate hub for keeping a family’s clothes in order. It combines a closet, laundry area, and folding station into one organized space. The design makes the entire process of washing, drying, and putting away clothes much simpler.
A large central island is used for folding, with built-in hampers for sorting lights and darks. A command center on the wall features a calendar and a corkboard for reminders. The closet area has space for everyone’s clothes, with baskets and bins clearly labeled. It’s a system designed to manage the chaos of family life.
DIY Guide: Set Up Your Own Laundry Command Center
You can create a zone like this in your laundry room or even a corner of a mudroom.
Step 1: Create a Folding Island You don’t need a custom island. Find a sturdy, flat-topped table or a small kitchen island. Place it in the middle of your room. This will be your dedicated folding surface. Having a clear, empty space just for folding makes the job much easier.
Step 2: The Sorting Station Underneath your new folding table, place two or three laundry baskets. Get some big stencils or vinyl letters from a craft store. Label each basket clearly: “LIGHTS,” “DARKS,” and “WHITES.” This makes it easy for everyone in the family to sort their own dirty clothes.
Step 3: Make a Command Center Wall Pick a wall and hang up a large corkboard and a dry-erase calendar. Use the calendar to schedule laundry days or keep track of after-school activities. Use the corkboard to pin up clothing care instructions, school permission slips, or a weekly schedule.
Step 4: Use Labeled Bins In your closet or on shelves, use open bins or baskets. Give each family member their own bin. When you finish folding clean laundry, put each person’s clothes in their designated bin. It’s their job to take their bin and put their clothes away in their room.
Step 5: Add a Valet Hook Install a simple hook on the wall. This is a great place to hang items that need to be ironed or clothes that are ready to be worn for a special occasion tomorrow.
27. The Playful Building Block Organizer

This closet is pure fun. It’s built from giant, colorful stacking blocks that look just like LEGOs. This turns a simple storage unit into an exciting part of a kid’s room.
The blocks are not just for looks; they are also functional drawers and storage bins. The system is modular, meaning you can stack the blocks in any way you like to create different shapes and sizes. It’s a wonderfully creative design that encourages kids to clean up by making it feel like playtime.
DIY Guide: Make Your Own Stacking Block Storage
You can get this fun, blocky look by decorating simple wooden boxes.
Step 1: Get Your Blocks Go to a craft store or hardware store and buy several unfinished wooden crates or boxes. Get them in a few different sizes. These will be your building blocks.
Step 2: Paint Them Bright Get some sample pots of paint in bright, primary colors like red, blue, and yellow. Paint each of your wooden crates a different solid color. Make sure to paint the inside and the outside. Let them dry completely.
Step 3: Make the “Nubs” The most important part of the LEGO look is the round nubs on top. To make these, get some round wooden discs from a craft store. Paint them the same color as the box they will go on. Once they are dry, use strong wood glue to attach six or eight of them to the top of each crate.
Step 4: Stack ‘Em Up! Now you can arrange your new building blocks. Stack them up against a wall to create your own custom shelving unit. You can arrange them in a pyramid shape or like a set of stairs. For safety, if you stack them high, you should use some screws to attach the blocks to each other and to the wall.
Step 5: Add Bins and Rods You can slide smaller plastic bins into some of the open crates to hold toys or socks. You can also install a simple closet rod between your new block tower and the wall to create a space for hanging clothes.
28. The School Week Superhero Station

This closet system is a parent’s best friend on busy school mornings. It’s designed to plan out a child’s outfits for the entire week. This simple idea can eliminate the daily “what to wear” arguments.
The system uses a cubby for each day of the week, from Monday to Friday. Each cubby holds a complete, pre-planned outfit. Chalkboard labels make it easy to change the plan. There are also spots for reminders about homework and after-school activities. It’s a brilliant way to teach kids about planning and make mornings run more smoothly.
DIY Guide: Your Own Weekly Outfit Planner
This is an easy and inexpensive DIY project that will save you a lot of time in the morning.
Step 1: Get a Cubby Shelf The main part of this system is a simple cubby shelving unit. You need one with at least five spaces. You can find these at any big box store or furniture store. Assemble it and place it in your child’s closet.
Step 2: Create Daily Bins Get five fabric storage bins that fit inside your cubby shelves. Choose a fun color that your child likes. These will be your daily outfit holders.
Step 3: Make Chalkboard Labels Buy some small, inexpensive wooden plaques from a craft store. Paint them with black chalkboard paint. Once they are dry, you can attach them to the front of your fabric bins with glue or a safety pin.
Step 4: Plan the Week On Sunday evening, sit down with your child. Check the weather for the upcoming week. Let them help you pick out five complete outfits. Fold each outfit and place it in one of the bins. Use chalk to label each bin with the day of the week.
Step 5: Add a Reminder Board Get a small whiteboard or chalkboard and hang it on the wall next to the cubbies. Each evening, you can write a reminder for the next day, like “Gym clothes needed!” or “Don’t forget your library book!”
29. The Free-Spirit’s Bohemian Bazaar

This dressing area has a warm, eclectic, and free-spirited vibe. It’s not a traditional closet, but a collection of unique pieces that come together to create a personal and artistic space. The style is all about natural materials, vintage finds, and handmade items.
A distressed wooden armoire provides the main storage, while a rustic ladder is used to hang scarves. Jewelry is displayed on a coat rack, and a large, ornate mirror leans against the wall. The mix of textures—from woven baskets to macrame wall hangings—creates a cozy and inviting atmosphere. This is for someone who wants their storage to be as unique as their style.
DIY Guide: Create Your Own Bohemian Hideaway
This look is all about using things in new and creative ways. Go on a treasure hunt in your own home or at a thrift store.
Step 1: The Scarf Ladder Find an old wooden ladder. It doesn’t have to be strong enough to climb on. Just clean it up and lean it against a wall. Now you can drape all your beautiful scarves over the rungs. It’s both storage and decoration.
Step 2: Jewelry Tree Get a simple, standing wooden coat rack or a “hall tree.” Instead of coats, use it to hang all your long necklaces and bracelets. It keeps them from getting tangled and turns them into a beautiful display.
Step 3: Woven Baskets for Everything Collect woven baskets in all shapes and sizes. You can use them on shelves or on the floor. Use a large one for laundry, a medium one for shoes, and small ones on a bookshelf to hold socks or belts.
Step 4: Find a Statement Mirror Look for a large mirror with an interesting, carved wooden frame at a flea market or thrift store. You don’t even have to hang it. Just lean it against a wall to make your space feel bigger and brighter.
Step 5: Add a Touch of Green Bring some nature inside. Get a few easy-to-care-for plants, like ivy or pothos. Let them hang down from the top of a bookshelf or wardrobe. The green leaves will add life and color to your bohemian space.
30. The Art Deco Glamour Nook

This closet is pure Hollywood glamour from a bygone era. The design is inspired by the Art Deco style of the 1920s, with its bold lines, geometric shapes, and luxurious materials. It’s a small space that makes a huge statement.
The striking combination of black, white, and gold creates a dramatic look. Arched shapes and fluted glass on the cabinets are classic Art Deco details. The vanity is the star, with a statement mirror and beautiful shell-shaped light fixtures. It’s a highly sophisticated and elegant design that turns getting ready into a special occasion.
DIY Guide: Add Some Art Deco Wow to Your Vanity
You can give a plain vanity or desk this glamorous 1920s makeover with some paint and clever details.
Step 1: The Black and Gold Foundation Start with a simple desk or vanity. Paint the main body of it a bold, matte black. Then, use a small brush and some shiny gold craft paint to carefully paint all the handles and the legs of the furniture. The contrast is key.
Step 2: Create Geometric Shapes Art Deco style loves bold lines. Get some thin, metallic gold pinstripe tape from an auto parts store or a craft store. Use this tape to create a simple, clean border around the edges of your drawers and the top of the vanity.
Step 3: Fake the Fluted Glass This is a clever trick. Buy a roll of “fluted” or “ribbed” window privacy film online. This is a sticky plastic that looks like textured glass. Carefully apply it to the glass panels in your closet doors or even to a plain mirror to get that classic Art Deco texture.
Step 4: Find a Statement Light Look for a small lamp or wall light that has a fan or shell shape. The lighting is a very important part of this style. Even one special light fixture can transform the whole space.
Step 5: Accessorize with Style Finish your new vanity nook with the right details. Get a round, velvet-covered stool in a rich color like emerald green or deep blue. Use gold-colored trays to hold your perfume bottles and makeup brushes.
31. The Sleek Sliding Door System

This closet offers a clean, modern look that saves a lot of space. Instead of swinging outwards, the doors slide smoothly to the side. This is a fantastic feature for smaller rooms where you don’t have space for a traditional door to open.
Inside, the closet is thoughtfully organized with a mix of hanging space, drawers, and shelves. A special feature is the pull-out mirrored accessory cabinet. It slides out to reveal hidden storage for jewelry and small items, with a convenient mirror right where you need it. It’s a smart, space-saving design that is both stylish and highly functional.
DIY Guide: Get the Space-Saving Sliding Door Look
While installing full sliding doors can be a big job, you can get the same space-saving benefits with some clever tricks.
Step 1: Use a Curtain The simplest way to replace a bulky door is with a heavy curtain. Install a sturdy curtain rod across the front of your closet opening. Choose a nice, thick fabric that matches your room’s decor. It will hide the clutter and is easy to slide open and closed.
Step 2: Build a Pull-Out Mirror This is the coolest feature to replicate. Go to a hardware store and buy a pair of full-extension drawer slides (the kind that lets a drawer pull all the way out). Attach one side of the slides to the inside wall of your closet. Attach the other side to a tall, narrow piece of wood.
Step 3: Add the Mirror and Storage On the front of your new wooden slide-out panel, attach a full-length mirror. On the back of the panel, you can add small hooks and trays for your jewelry and accessories. Now you have a hidden, slide-out mirror and storage station.
Step 4: Maximize the Inside Because you’ve saved so much space with the door, you can add more storage inside. Install some simple drawers or a small shelving unit inside the closet to hold your folded clothes and shoes.
Step 5: Add Motion-Sensor Lights Since sliding doors or a curtain can make a closet darker, stick a battery-powered, motion-activated light on the inside ceiling. It will turn on automatically whenever you slide your door open.
32. The Calm & Coordinated Walk-In

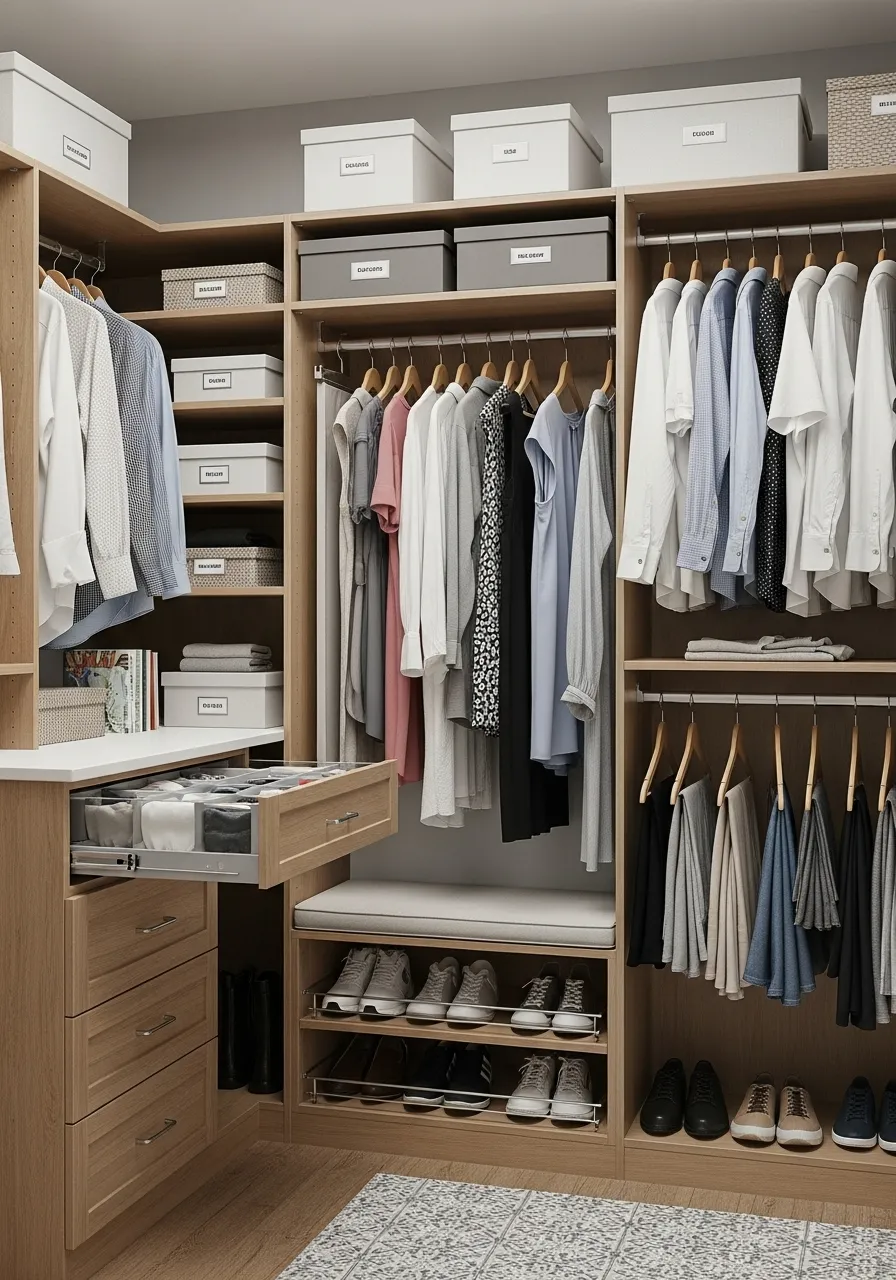
This walk-in closet is designed to be a peaceful, orderly retreat. The light wood finish and simple, clean lines create a calm and inviting atmosphere. The entire space is built around the idea of having a specific place for everything, which makes it easy to keep tidy.
The system uses a smart combination of hanging rods, drawers, and open shelves. A built-in bench provides a convenient spot to sit while putting on shoes, with shoe storage neatly tucked underneath. Labeled boxes on the top shelves keep seasonal items organized and dust-free. It’s a classic, functional design that will never go out of style.
DIY Guide: Create Your Own Coordinated Closet
You can get this calm, organized look by focusing on consistency and smart storage.
Step 1: Choose a Consistent Wood Tone The key to this look is making everything match. If your shelves are a light wood color, try to find drawers and accessories in a similar tone. If you have mismatched pieces, you can cover them with a light wood-grain contact paper to make them all look the same.
Step 2: Build a Shoe Bench You don’t need a custom built-in. Find a small, simple bench. Place it in your closet. Underneath the bench, add a low, two-tiered shoe rack. Now you have a place to sit and an organized spot for your shoes.
Step 3: Box It Up Go to a craft or office supply store and buy a set of matching storage boxes. White or gray boxes work well. Use these for the top shelf of your closet. Store things you don’t use every day, like winter hats or extra blankets, inside them.
Step 4: Label Your Boxes To stay organized, you need to know what’s in your boxes. Buy some simple, stick-on metal label holders. You can slide a small piece of paper into them to label the contents of each box. This looks much nicer than just writing on the box.
Step 5: Use Drawer Dividers For the drawers, buy some simple drawer dividers. Use them to create dedicated lanes for your socks, underwear, and belts. This will keep the inside of your drawers looking as neat and calm as the outside of your closet.
33. The Personalized Memory Wall

This closet design is all about making your storage personal and inspiring. It uses a large corkboard wall as the backdrop for the whole system. This turns a functional space into a giant, ever-changing mood board.
The closet itself is simple, with open shelves and hanging rods made from light, natural wood. This simple structure allows the corkboard to be the star. You can pin up photos, postcards, jewelry, and inspiring quotes. It’s a wonderfully creative design that mixes organization with personal expression.
DIY Guide: Create Your Own Inspiration Closet
This is a fun and easy project that makes your closet truly your own.
Step 1: Install the Cork Wall The main feature is the corkboard. Go to an office supply store or look online for corkboard tiles or a large cork roll. With an adult’s help, glue these directly to the back wall of your closet. Cut them to fit around any existing shelves.
Step 2: Build Simple Shelves You want the shelves to be simple so the corkboard stands out. Get some plain wooden planks and simple brackets from a hardware store. Install a long shelf high up in the closet and another one lower down. Keep the wood in its natural, light color.
Step 3: Add a Hanging Rod Install a simple wooden dowel as your hanging rod. You can hang it from the bottom of your top shelf using special brackets. This will complete the basic structure of your closet.
Step 4: Use Fabric Bins For the lower shelf, get some simple, light-colored fabric bins. Cream or beige bins look great against the natural wood and cork. Use these to store folded t-shirts, shorts, or other items you don’t want to hang. Add a small leather tag to the handles for a stylish touch.
Step 5: Personalize Your Wall Now for the best part! Get a box of pushpins. Start pinning up your favorite things on your new cork wall. You can hang necklaces, photos of your friends, concert tickets, and anything else that makes you happy. You can change it around whenever you want a new look.
34. The Green Thumb’s Wardrobe

This closet brings a touch of nature inside. It’s designed for someone who loves plants and wants to create a healthy, fresh environment for their clothes. The use of natural wood and live plants makes this closet feel like a breath of fresh air.
The system uses a simple, slatted wood structure that allows air to circulate. Special features include built-in planters with grow lights, ensuring the plants thrive even without sunlight. There’s also an air purifier to keep the space fresh. Jars of lavender and cedar blocks add a natural, pleasant scent. It’s a unique and eco-friendly approach to clothing storage.
DIY Guide: Create a Fresher, Greener Closet
You don’t need a built-in jungle to get the benefits of this fresh closet.
Step 1: Choose the Right Plants The most important step is picking plants that can survive in low light. Snake plants and pothos plants are great choices. They are very tough and are also known for being good at purifying the air.
Step 2: Add a Grow Light Even low-light plants need some light. Buy a small, clip-on LED grow light. You can clip this onto a shelf and aim it at your plants. Set a timer so it turns on for a few hours every day.
Step 3: Use Cedar for Freshness Go to a home goods store and buy some cedar blocks, cedar balls, or cedar hangers. Place them on your shelves and in your drawers. Cedar naturally repels moths and has a wonderful, clean smell. It’s a great, chemical-free way to protect your clothes.
Step 4: Bring in a Dehumidifier To prevent any musty smells, especially if you have plants, get a small, renewable dehumidifier. These are little boxes filled with special beads that absorb moisture from the air. You don’t need to plug them in. When the beads change color, you just plug the unit in to “recharge” it and then it’s ready to use again.
Step 5: Let the Air Flow If your closet has solid doors, try to leave them open a little bit each day to let fresh air circulate. If you have slatted doors, that’s even better! Good airflow is key to a fresh closet.
35. The Socialite’s Entertainment Suite

This closet is designed for someone who loves to entertain. It’s more than just a place to store clothes; it’s a glamorous dressing room and a mini party hub all in one. The design is bright, luxurious, and ready for a celebration.
The space features a built-in makeup vanity with Hollywood-style lights. Backlit shelves beautifully display a collection of designer shoes and handbags. The most unique feature is the built-in mini-fridge, stocked with champagne and cold drinks. A stylish gold bar cart is ready to serve guests. It’s the ultimate in luxury and hospitality.
DIY Guide: Create Your Own Glamorous Get-Ready Room
You can add this fabulous, party-ready vibe to your own closet with a few fun additions.
Step 1: Add Some Backlighting The key to this luxe look is the lighting. Buy some warm-white LED light strips with a sticky back. Run them along the back edge of your shoe and handbag shelves. When you turn them on, your accessories will have a beautiful glow, just like in a high-end store.
Step 2: Create a Bar Cart Corner You don’t need a built-in. Find a small, stylish bar cart. A gold or brass one works best for this look. Stock it with some nice glasses, your favorite drinks, and a small speaker for music. This instantly makes the space feel more fun and social.
Step 3: Get a Mini-Fridge A mini-fridge isn’t just for drinks. You can buy a small, “skincare” mini-fridge online. They are tiny and look very chic. Use it to keep a few bottles of water, some face masks, or your favorite face mist cool. It adds a touch of spa-like luxury.
Step 4: Upgrade Your Mirror If you have a simple mirror, give it a Hollywood makeover. You can buy stick-on vanity light bulbs that you can place around the edge of any mirror. This will give you that bright, glamorous light for doing your makeup.
Step 5: Use Mirrored Trays Go to a home decor store and find some beautiful mirrored trays. Use these on your vanity or a shelf to organize your perfumes and makeup. The mirrored surface will reflect the light and add to the glamorous, sparkling feel of the room.
36. The Matte Black Minimalist Wardrobe

This closet is the definition of sleek, modern, and understated style. The entire unit is finished in a deep, matte black, creating a bold and dramatic look. The design is all about clean lines and a complete absence of clutter.
The wardrobe features flat-panel doors with no visible handles, which adds to the seamless, minimalist appearance. When a section is opened, it reveals a simple, well-organized interior with integrated lighting. This design is for someone who appreciates a powerful, simple aesthetic and believes that less is more.
DIY Guide: Get the Sleek Matte Black Look
You can transform any basic wardrobe into this modern masterpiece with some paint and smart hardware.
Step 1: Choose the Right Paint The most important part is the paint. Go to a paint store and ask for a high-quality, durable furniture paint in a matte or “supermatte” black finish. A matte finish doesn’t reflect light, which gives it that modern, sophisticated look.
Step 2: Prep and Paint This is a job for the weekend. Empty your wardrobe and, if you can, take the doors off. Lightly sand all the surfaces to help the paint stick. Then, carefully paint everything with your new matte black paint. You will likely need two or three thin coats. Let it dry completely.
Step 3: Hide the Handles To get that seamless look, you need to get rid of the handles. If you have knobs, unscrew them and fill the holes with wood filler. Sand the filler so it’s smooth, then paint over it.
Step 4: Install “Push-to-Open” Hardware So how do you open the doors without handles? You use special hardware called “push-to-open” or “touch” latches. You install these small magnetic or spring-loaded devices on the inside of the cabinet. Now, you just gently press on the corner of the door, and it will pop open.
Step 5: Add Interior Lighting The inside of a black closet can be very dark. Install some battery-powered, motion-activated LED light strips on the inside of the cabinet. They will turn on automatically when you push the door open, revealing your neatly organized clothes.
37. The “His and Hers” Shared Harmony Closet

This closet is a thoughtful solution for a shared space. It’s designed to be perfectly symmetrical, giving each person an equal and identical area to call their own. This mirror-image layout helps to keep things fair and organized.
Each side has the same amount of hanging space, the same number of drawers, and the same shelving. This simple but effective design prevents one person’s wardrobe from creeping into the other’s territory. The calm, neutral color scheme and clear labeling make it a peaceful and functional space for two.
DIY Guide: Create a Fair and Balanced Shared Closet
You can bring this kind of harmony to any closet you share with a partner or sibling.
Step 1: The Great Divide The first step is to create a clear visual dividing line. The easiest way to do this is with a strip of colorful painter’s tape or washi tape. Run the tape right down the middle of the back wall of the closet, from the ceiling to the floor. This is the new boundary.
Step 2: Mirror the Layout Now, try to make both sides look as similar as possible. If there’s a hanging rod on the left, make sure there’s one on the right. If you put a three-drawer unit on one side, put another one just like it on the other side. The goal is to make it a mirror image.
Step 3: Use Identical Hangers This is a small trick that makes a big difference. Get rid of all your mismatched hangers. Buy two sets of new hangers in two different colors—one color for each person. This instantly makes the closet look more organized and makes it easy to see whose clothes are whose.
Step 4: Label Everything Use a label maker or nice-looking tags to label shelves and bins. You can label them with what’s inside (“Sweaters,” “Socks”) or with each person’s name. This helps everyone remember where things are supposed to go.
Step 5: The “One In, One Out” Rule The best way to keep a shared closet from getting too crowded is to agree on a rule. The “one in, one out” rule means that every time someone brings a new piece of clothing home, they have to take one old piece of clothing out to donate or throw away.
38. The Bridal Boutique Wardrobe

This closet is a dream for anyone with a collection of beautiful dresses and formal wear. It’s designed to store delicate and special occasion garments with the care they deserve. The bright, clean design makes it feel like a private bridal boutique.
The space is dominated by long hanging areas, providing plenty of room for gowns to hang without wrinkling. Special velvet-lined, pull-out drawers are used to store delicate jewelry and accessories. Matching boxes on the top shelves can be used for storing veils, shoes, or other keepsakes in a protected, dust-free environment.
DIY Guide: Create Your Own Special Occasion Closet
You can create a safe and beautiful space for your best clothes with a few simple upgrades.
Step 1: Go All-White To get that clean, boutique feel, paint the inside of your closet a bright, clean white. This will make your beautiful clothes stand out and will also make it easier to see colors accurately.
Step 2: Make Room for Long Garments If you have a lot of long dresses, you may need to adjust your closet layout. With an adult’s help, you can move a hanging rod higher up in the closet. This will create the vertical space you need to hang your gowns so they don’t bunch up on the floor.
Step 3: The Velvet Touch This is a simple and luxurious trick. Pick one or two drawers to be your special accessory drawers. Buy some self-adhesive velvet liner online or from a craft store. It works like contact paper. Carefully line the bottom of your drawers with the velvet. This will protect your delicate jewelry from scratches.
Step 4: Use Padded Hangers Don’t hang your delicate dresses on wire or plastic hangers. Invest in a set of beautiful, padded satin hangers. They will protect the delicate fabrics and prevent the shoulders of your dresses from getting stretched out.
Step 5: Use Archival Boxes For very special items, like a wedding dress or a family heirloom, you need to store them properly. Buy an acid-free archival storage box. These boxes are designed to protect delicate fabrics from turning yellow over time. Store the box on a high shelf where it won’t be disturbed.
39. The Crafter’s Creative Hub

This space is a dream for any crafter, artist, or hobbyist. It cleverly transforms a closet into a compact and highly organized creative studio. Everything you need for your projects is visible and within easy reach.
The system uses a combination of wire shelving, a pegboard for tools, and lots of clear storage containers. A fold-out desk provides a workspace when needed but can be tucked away to save space. A rolling cart adds flexible storage that can be moved around the room. It’s a brilliant example of how to create a dedicated creative space, even if you don’t have a spare room.
DIY Guide: Build Your Own Closet Craft Station
Turn any closet into your personal creative corner with this fun project.
Step 1: Install a Pegboard The pegboard is the most important part of a craft closet. Buy a large pegboard from a hardware store. With an adult’s help, mount it to the back wall of your closet. Use wooden spacers behind it so there is a small gap for the hooks to fit in.
Step 2: Get Hooked Go to the hardware store and buy a big assortment of pegboard hooks. Get different shapes and sizes. Use them to hang your tools, scissors, spools of thread, and anything else you can think of.
Step 3: Use Clear Storage The key to organizing craft supplies is being able to see them. Go to a craft or office supply store and buy a lot of clear plastic containers. Get small sets of drawers for things like buttons and beads, and larger stackable bins for fabric or yarn.
Step 4: Create a Fold-Down Desk This is a great space-saving trick. You will need a flat piece of wood and two special pieces of hardware called “folding shelf brackets.” Mount the brackets to the wall inside your closet at a comfortable desk height. You can then attach your wooden plank to the brackets. Now you can fold your desk up when you need it and down when you’re done.
Step 5: Get a Rolling Cart A small, multi-tiered rolling cart is a crafter’s best friend. You can load it up with the supplies you are currently using for a project and roll it right next to you while you work. When you’re finished, you can roll it back into its spot in the closet.
40. The Modern Farmhouse Barn Door Wardrobe

This closet combines the rustic charm of a country farmhouse with clean, modern organization. The standout features are the beautiful sliding barn doors. They save space and add a ton of character to the room.
Behind the doors, the closet is simple and functional. Open shelves are filled with wire baskets and fabric bins, which adds to the cozy, rustic feel. The light, natural wood of the doors and the simple black metal hardware are classic elements of the modern farmhouse style. It’s a warm and inviting design that is both stylish and practical.
DIY Guide: Get the Farmhouse Look with a Mini Barn Door
Building a full-size barn door can be a big project, but you can get the same look on a smaller scale.
Step 1: Find Mini Barn Door Hardware The special hardware is what gives this look its charm. Go to a hardware store or look online for a “mini barn door hardware kit.” These are designed for smaller projects like cabinets or windows, and they are much easier to install than the full-size versions.
Step 2: Build a Simple Door You can build your own mini barn door. Get a few light-colored wooden planks, like pine. Lay them side-by-side. Then, lay one plank diagonally across them and screw it in place. This will create that classic “Z” barn door look. You can stain or paint the door, or leave it natural.
Step 3: Install the Track Follow the instructions in your hardware kit to install the small metal track above a section of your closet shelving. You will then attach the little rollers to the top of your new mini door.
Step 4: Hang Your Door Carefully lift your door and hook the rollers onto the track. Your new mini barn door should now be able to slide back and forth, covering part of your shelving. It’s a great way to hide a little bit of clutter while adding a lot of style.
Step 5: Use Baskets and Bins To complete the farmhouse look, fill your open shelves with baskets. Use wire baskets for a more industrial feel, or wicker baskets for a softer, more traditional look. Gingham or plaid fabric liners inside the baskets are also a great farmhouse touch.
41. The Chameleon LED Closet

This wardrobe brings a futuristic light show into the bedroom. The doors are made of interactive LED panels that can change color and pattern with the touch of a button. It’s a piece of furniture that doubles as a dynamic work of art.
A wall-mounted tablet gives you full control over the light display, allowing you to match the closet’s color to your mood or your room’s decor. You can create a soft, gentle glow or a vibrant, colorful light show. This is a stunning and high-tech design for someone who loves to combine technology with bold, personalized style.
DIY Guide: Create Your Own Light-Up Wardrobe
You can give any boring closet this amazing, colorful glow with some simple tech.
Step 1: Get Smart LED Strips The magic comes from “addressable” RGB LED light strips. Look for a kit that comes with a power supply and a Wi-Fi or Bluetooth controller. This will let you control the lights from a smartphone app.
Step 2: Create a Frosted Surface The lights look best when they are diffused, not when you see the bare bulbs. Buy some frosted window privacy film. Carefully apply this film to the front of your closet doors. If your doors aren’t flat, you can attach the film to a thin sheet of plexiglass and hang that in front of your doors.
Step 3: Install the Lights With an adult’s help, stick the LED light strips to the back of your closet doors, behind the frosted film. You can run them back and forth in a snake-like pattern to cover the whole door.
Step 4: Connect the Power Follow the instructions that came with your light kit to connect the strips to the controller and the power supply. You may need to run a thin wire from the door to the inside of the closet. Be careful not to pinch the wire when you close the door.
Step 5: Control Your Light Show Download the app for your smart light controller. Now you can use your phone or a tablet to change the colors, create flowing rainbow patterns, or make the lights pulse to your music. Your closet is now the coolest thing in your room!
42. The Climate-Controlled Wardrobe

This closet is designed to give your clothes the ultimate level of care and protection. It’s a high-tech wardrobe with a built-in climate control system. This keeps your garments in pristine condition by managing the environment inside.
The system includes units that purify the air, control the humidity, and circulate fresh air, preventing any musty smells and protecting delicate fabrics. The closet itself is made of natural wood with glass doors, allowing you to see your well-protected collection. It is a serious solution for someone who invests in high-quality clothing and wants to preserve it for years to come.
DIY Guide: Create a Fresher, Healthier Closet
You don’t need to install an HVAC system to give your clothes better protection from the environment.
Step 1: Control the Moisture The biggest enemy of a fresh closet is dampness. Buy a renewable mini-dehumidifier. These are small, quiet boxes filled with silica beads that absorb moisture from the air. When the beads change color, you just plug the unit into a wall outlet to dry it out, and then it’s ready to use again.
Step 2: Purify the Air To get rid of any stale smells, use activated charcoal air purifying bags. These are little fabric bags filled with charcoal that naturally absorb odors. Hang a few of them in your closet. To “recharge” them, you just place them in the sun for a few hours once a month.
Step 3: Add the Scent of Cedar Cedar wood is a classic way to keep closets fresh and protect clothes from moths. Buy a few cedar blocks or rings. You can hang them on your hangers or place them in your drawers. They add a wonderful, clean scent and are a great natural alternative to chemical mothballs.
Step 4: Let It Breathe Good air circulation is important. Once or twice a week, try to leave your closet doors open for an hour. This lets fresh air move around and prevents the air inside from becoming stagnant.
Step 5: Keep It Clean A simple but important step is to never put dirty or damp clothes back in the closet. Make sure everything is completely clean and dry before you hang it up. This will go a long way in keeping your whole wardrobe fresh.
43. The Virtual Stylist Closet

This closet brings the power of technology to your personal style. It’s a “smart” wardrobe that digitally catalogs every piece of clothing you own, acting like a personal stylist right in your phone.
Each hanger is fitted with a small electronic tag. These tags sync with an app, creating a virtual inventory of your entire wardrobe. The app can then suggest outfits, show you what you haven’t worn in a while, and help you plan what to wear based on the weather. It’s a revolutionary way to manage your clothes and get more creative with your style.
DIY Guide: Create Your Own Digital Wardrobe
You can get the benefits of a smart closet without the high-tech tags. All you need is your phone and a little bit of organization.
Step 1: Download a Closet App There are many great apps for organizing your clothes. Search for “closet organizer” or “wardrobe app” in your app store. Find one that lets you take pictures of your clothes and sort them into categories like “shirts,” “pants,” and “shoes.”
Step 2: Have a Photo Shoot This is the big task. Take a clear photo of every single piece of clothing you want to track. It’s easiest if you lay each item flat on your bed or the floor against a plain background.
Step 3: Upload and Categorize Upload all your photos into the app. As you go, put each item into the correct category. The app will use this information to help you build outfits later.
Step 4: Create QR Code Tags This is a fun, techy step. Use a free QR code generator website. You can create a code for each section of your closet (e.g., “T-Shirts,” “Jeans”). Print these codes on sticky labels and put them on your shelves or bins. When you scan the code with your phone, you can have it open the “T-Shirt” category in your app.
Step 5: Plan Your Outfits Now the fun begins! Use your new digital wardrobe to create and save outfits for school, weekends, or special occasions. When you’re not sure what to wear, you can just look through the outfits you’ve already created.
44. The Mood Lighting Closet

This closet understands that lighting is everything. It’s equipped with a smart, color-changing lighting system that allows you to see your clothes in different environments. This helps you pick the right outfit for any occasion.
With a simple tap on a smartphone, you can change the light from a warm, cozy yellow to a bright, cool white. The warm light is like the lighting in a nice restaurant, while the cool light is closer to natural daylight. This is a brilliant feature for anyone who cares about color and wants to make sure their outfit looks just right.
DIY Guide: Install Your Own Smart Closet Lighting
This is a really fun and easy tech upgrade for any closet.
Step 1: Get Color-Changing LED Strips The key to this project is a smart LED light strip kit. Look for one that is “RGBW.” This means it can create millions of colors (RGB) and also has a separate chip for a clean, natural white (W). Make sure it comes with a Wi-Fi controller so you can use it with an app.
Step 2: Plan Your Layout Decide where you want to put the lights. Running a strip along the top front edge of the inside of your closet is a great place to start. This will shine the light down and back onto your clothes.
Step 3: Stick Them On Most LED light strips come with a sticky tape on the back. Just peel off the backing and carefully press the light strip into place. Make sure the surface is clean and dry first.
Step 4: Connect to Power and Wi-Fi Plug the light strip into its controller and then into the power adapter. Follow the instructions that came with your kit to connect the controller to your home’s Wi-Fi network.
Step 5: Set Your Scenes Download the app for your lights. Now you can play! Create a few different “scenes” or “presets.” Make a “Daylight” scene with a bright, cool white light for seeing true colors. Create an “Evening” scene with a warm, soft yellow light. Now, with one tap, you can see how your outfit will look wherever you’re going.
45. The Natural Bamboo Sanctuary

This closet brings a sense of calm and nature into the home. It’s built from beautiful, light-colored bamboo, creating a warm and eco-friendly storage space. The design feels clean, airy, and reminiscent of a peaceful spa.
The system is highly functional, with a mix of hanging rods, shelves, and deep drawers. Special drawer dividers keep smaller items like socks and accessories neatly organized. The use of natural materials like bamboo and woven baskets throughout makes this closet a truly serene and restful place to start your day.
DIY Guide: Get the Natural Bamboo Look
You can give your closet this beautiful, spa-like feel with some clever materials and organization.
Step 1: The Bamboo Makeover The easiest way to get this look is with high-quality, bamboo-patterned peel-and-stick wallpaper or vinyl wrap. Carefully cover the inside walls of your closet and any plain shelves or drawers. This will instantly transform the look of the space.
Step 2: Create Custom Drawer Dividers This is a great way to get super organized. Go to a craft store and buy some thin strips of balsa wood or actual bamboo. Measure the inside of your drawers. Cut the strips to create a grid pattern inside your drawer. You can glue the pieces together to make them permanent.
Step 3: Use Wooden Hangers To continue the natural, coordinated look, get rid of any plastic or wire hangers. Replace them with a set of simple, light-colored wooden hangers. This is a small change that makes the whole closet feel more high-end and organized.
Step 4: Add Woven Baskets Go to a home goods store and find some woven baskets made from seagrass or water hyacinth. Use these on your shelves to hold folded clothes or other items. The natural texture will add to the calm, spa-like atmosphere.
Step 5: Add a Natural Scent Complete the sanctuary feel with a natural scent. Place a small, essential oil reed diffuser on a shelf with a calming scent like lavender or sandalwood. Or, hang a small bag of dried lavender from your closet rod.
Key Takeaways
Here are the main points to remember as you start your organization journey:
- Think Vertically and Awkwardly. Your most valuable storage space is often upward or in strange corners. Don’t be afraid to use high shelves for seasonal items or custom-fit solutions for under a staircase.
- DIY is Your Best Friend. You don’t need a professional to create a beautiful and functional closet. Simple projects using paint, pegboards, or industrial pipes can completely transform your space.
- Labels Are a Game Changer. The simplest way to maintain order is to know where everything goes. Using clear, consistent labels on bins, baskets, and shelves makes tidying up quick and easy for the whole family.
- Your Closet Can Be More Than Storage. A closet can also be a workspace, a travel hub, or a creative studio. Thinking about how your closet can serve your lifestyle opens up a world of possibilities.
Transforming your closet from a disaster zone into an organized sanctuary is completely within your reach. As you’ve seen, a functional and stylish system isn’t about having a huge space or a big budget. It’s about finding a smart solution that works for you.
Whether you’re drawn to a minimalist floating wardrobe or a playful building block organizer, the power to create order is in your hands. So pick an idea, grab your tools, and get ready to build a space that makes your daily routine simpler and a lot more peaceful.