As the seasons turn and a crispness fills the air, there is a natural pull to slow down and turn inward. Our homes become cozy retreats, and we find ourselves looking for simple ways to add layers of warmth and comfort to our daily lives.

This is the magic of a good blanket. With a simple drape over a chair or a fold at the end of a bed, a throw can instantly change the mood of a room. It’s one of the easiest and most affordable ways to update your decor for the winter months, adding colour, texture, and a silent invitation to relax.
In this guide, we’ll explore a world of cozy options, from the rustic charm of a wool plaid to the modern elegance of a velvet comforter. Each one is a source of inspiration for creating your own warm and welcoming space.
To make that space even more personal, we’ve included a simple DIY craft for every blanket. These projects are designed to be fun and accessible, proving that a little creativity is the best ingredient for a truly comfortable home.
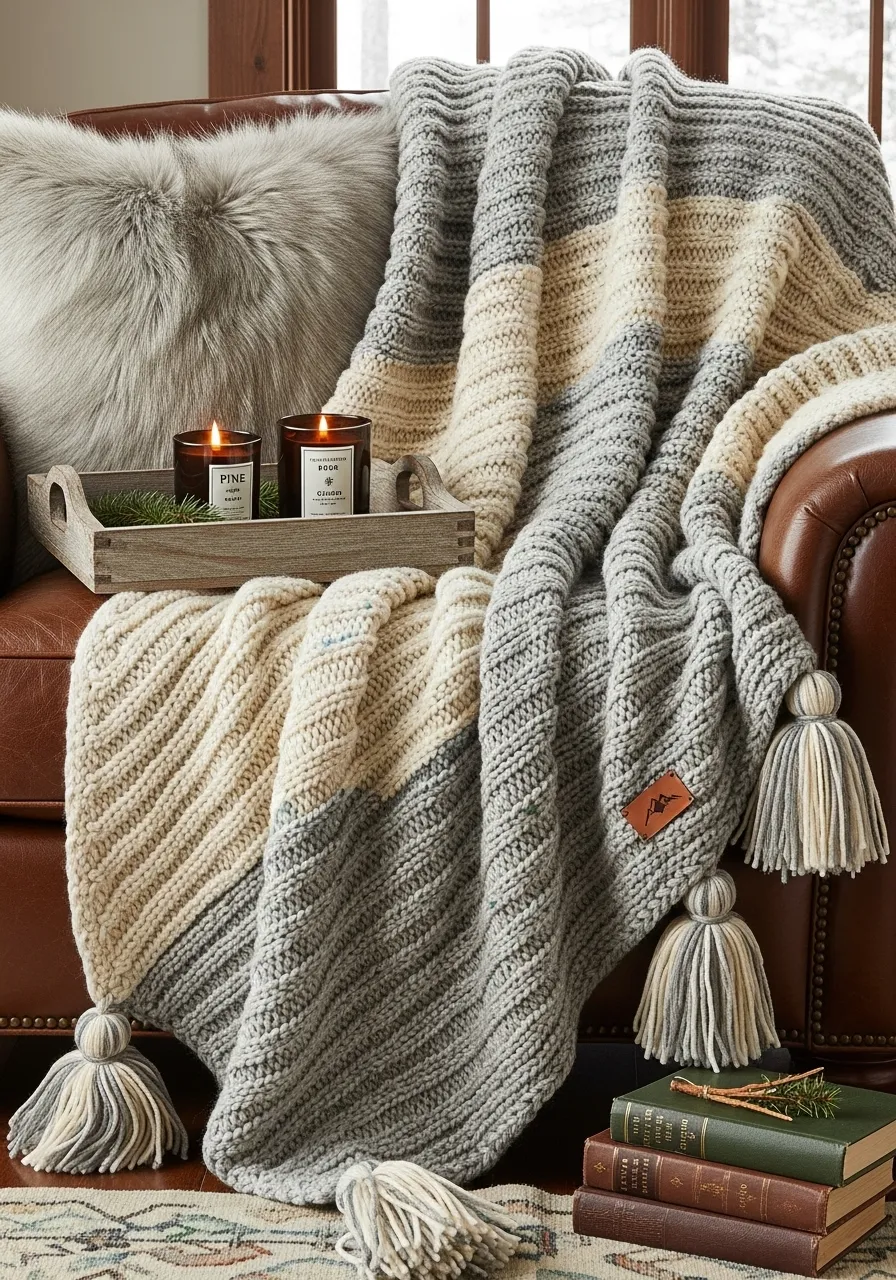
1. The Fireside Chunky Knit Throw

This throw is the essence of cozy. The thick, oversized knit gives it a wonderful texture and a feeling of handmade warmth. Its soft, neutral colors—a gentle cream and a calming grey—are separated by a clean, wide stripe. It looks incredibly soft and inviting.
Large, fluffy tassels at the corners add a playful, handcrafted touch. Draped over a rich leather chair, it creates a scene that calls for a good book and a warm drink. This blanket is a statement piece of comfort.
DIY Chunky Yarn Coasters
You can make your own miniature version of this chunky look for your coffee mug.
What You’ll Need:
- Thick, chunky yarn
- A pair of scissors
- A hot glue gun
Step-by-Step Instructions:
- Start Your Coil: Take the end of your chunky yarn and curl it into a tiny, tight spiral. Put a small dot of hot glue on the end to hold it in place.
- Keep Wrapping: Continue to coil the yarn around your starting spiral. Every once in a while, add a small dot of hot glue to the side of the coil and press the new yarn against it. This will keep your coaster from unraveling.
- Make It the Right Size: Keep coiling your yarn until your flat circle is big enough for a mug to sit on, usually about 4 inches across.
- Finish It Off: Once it’s the right size, cut the yarn from the ball. Put a final dot of glue on the end and press it firmly against the side of the coaster to secure it. Let it dry completely before using!
2. The Minimalist Snowflake Duvet

This duvet brings a quiet, peaceful feeling of winter indoors. The clean white fabric is covered in a simple, geometric pattern of fine grey lines. It feels modern and calm, not busy or loud.
A small, embroidered blue snowflake near the corner adds a delicate, surprising detail. The soft, gentle drape of the fabric over the bed looks inviting and clean. This is a subtle way to celebrate the season, focusing on a feeling of fresh, serene comfort.
DIY Stamped Napkins
You can add a simple pattern to plain cloth napkins using a pencil eraser.
What You’ll Need:
- Plain cotton napkins
- A pencil with a new, flat eraser on the end
- A small plate
- Fabric paint
Step-by-Step Instructions:
- Get Your Paint Ready: Squeeze a little bit of fabric paint onto your small plate. Spread it out into a thin, even layer.
- Make Your Stamp: Dip the flat eraser end of your pencil into the paint. Make sure you get a nice, even coat on it.
- Start Stamping: Press the eraser firmly down onto your napkin to make a dot. Lift it straight up. You’ve made your first mark!
- Create a Pattern: You can make all sorts of patterns. Stamp dots in straight lines to make a grid, or stamp them in a circle to make a snowflake shape.
- Let It Dry: When you are done with your design, let the paint dry completely. Ask a grown-up to help you follow the instructions on the paint bottle to set the design, which usually involves ironing it.
3. The Reversible Sherpa Throw

This blanket offers two distinct kinds of coziness in one. One side is a smooth, grey fleece that looks soft and simple. It’s a classic, go-to fabric for warmth.
The other side is a surprise of rich, amber-colored sherpa fleece. This material has a bumpy, sheep-like texture that is incredibly warm and plush. A thick, decorative stitch in white thread joins the two sides, adding a handcrafted detail. It’s a very practical and inviting blanket.
DIY No-Sew Fleece Scarf
You can make a cozy scarf with a decorative edge in just a few minutes.
What You’ll Need:
- A piece of fleece fabric (about 1 foot wide and 5 feet long)
- Sharp scissors
- A ruler
Step-by-Step Instructions:
- Cut Your Fabric: Lay out your fleece. Use your ruler and scissors to make sure it is cut into a nice, long rectangle.
- Time for Fringe: Lay one of the short ends of your scarf flat.
- Start Snipping: Use your scissors to make cuts into the fabric that are about 4 inches deep. Use your ruler to make each cut about 1 inch apart.
- Keep Going: Continue making these cuts all the way across the short end of the scarf.
- Do the Other Side: Now, go to the other short end of your scarf and do the exact same thing. That’s it! You don’t need to sew anything. Just fluff up the fringe, and your super warm scarf is ready to wear.
4. The Bohemian Tassel Throw

This throw is a celebration of texture and playful detail. The blanket itself has a rich, nubby weave with stripes of earthy colors like terracotta, cream, and charcoal. The pattern is bold and full of rustic charm.
What makes it truly special are the tassels. Dozens of large, fluffy tassels in a mix of colors hang from all sides. They add a fun, free-spirited energy to the piece. This is a heavy, substantial blanket that feels as good as it looks.
DIY Colorful Yarn Tassels
Tassels are easy to make and you can add them to anything, from the corners of a blanket to your backpack zipper.
What You’ll Need:
- Yarn in a few different colors
- A small, stiff piece of cardboard (about 4 inches tall)
- Scissors
Step-by-Step Instructions:
- Wrap Your Yarn: Hold the ends of a few different colors of yarn together. Start wrapping them around the piece of cardboard. Go around about 20 times. The more you wrap, the fatter your tassel will be.
- Tie the Top: Cut a new, single piece of yarn. Slide it underneath all the wrapped yarn at the top of the cardboard and tie a very tight knot.
- Slide It Off: Gently slide the whole yarn bundle off the cardboard.
- Make the “Neck”: Cut another piece of yarn. Wrap it tightly around the yarn bundle, about an inch from the top knot, to create the tassel’s little “head.” Tie it in a secure knot.
- Snip the Bottom: You will see a bunch of loops at the bottom of your tassel. Take your scissors and cut straight through all of them. Give it a little trim to make the ends even.
5. The Stargazer Velvet Comforter

This comforter is pure nighttime magic. Made from a deep, plush velvet in rich jewel tones of navy and emerald, it looks incredibly luxurious. The fabric catches the light, giving it a soft, beautiful sheen.
What makes it unique is the subtle sparkle. Tiny, glitter-like flecks are scattered across the fabric, looking like a distant galaxy of stars on a clear night. This is a heavy, opulent comforter that invites you to have the most glamorous, cozy sleep.
DIY Galaxy Painted Jar
You can capture a piece of the night sky in a jar. It’s a great decoration for your desk.
What You’ll Need:
- A clean, empty glass jar with a lid
- Cotton balls
- Water-based paint or food coloring in dark blue, purple, and pink
- A little bit of glitter
- A cup of water and a stick for stirring
Step-by-Step Instructions:
- The First Layer: Gently stretch out a few cotton balls and place them in the bottom of your jar.
- Add the First Color: In your cup, mix a little of your dark blue paint with some water. Pour just enough of this colored water into the jar to soak the cotton balls.
- Add Some Stars: Sprinkle a little bit of glitter on top of your first layer.
- The Next Layer: Add another layer of stretched-out cotton balls on top. Now, mix your purple paint with water and pour it over this second layer. Add more glitter.
- Keep Going: Continue to add layers of cotton balls, colored water (using your pink next!), and glitter until your jar is full. Put the lid on tight, and you have your very own swirling galaxy!
6. The Cabin Plaid Throw

This throw feels like a warm hug from a rustic cabin. The classic buffalo check pattern in red and black is a timeless design that is always cozy. A second throw in green and black offers a different, woodsy feel.
The fabric is a thick, soft fleece that looks incredibly warm. A simple stitched edge keeps the look clean and classic. Draped over a comfortable leather chair next to a fireplace, this is the picture of winter comfort. It’s a simple, honest, and very inviting blanket.
DIY No-Sew Plaid Coasters
You can make some rustic coasters to match this look without any sewing.
What You’ll Need:
- A few plain square tiles (from a hardware store) or square pieces of cork
- A piece of plaid flannel or fleece fabric
- A foam brush
- Mod Podge or white school glue
- Scissors
Step-by-Step Instructions:
- Cut Your Fabric: Place your tile on the fabric and cut a square that is just a little bit bigger than the tile.
- Glue It On: Use your foam brush to paint a thin, even layer of Mod Podge or glue all over the top of the tile.
- Smooth It Out: Carefully place your fabric square on top of the glue. Use your fingers to smooth out any wrinkles or bubbles.
- Seal the Top: Once the fabric is smooth, paint another thin layer of Mod Podge over the top of the fabric. It will look white at first, but it will dry clear. This protects the fabric from spills.
- Let it Dry: Let your coaster dry completely. The Mod Podge will create a hard, waterproof seal. You can trim any fuzzy edges with your scissors.
7. The Coastal Weave Throw

This blanket has a light, airy feel, like a breezy day at the beach. The open, net-like weave gives it a beautiful, delicate texture. The pattern is a simple, wide stripe of sea-blue and sandy beige.
A short, soft fringe along the edges adds to its relaxed, casual look. It’s not a heavy, thick blanket, but a light layer that would be nice for a cool evening. It brings a feeling of calm, coastal living into the room.
DIY Woven Friendship Bracelet
You can try a simple weaving project by making a classic friendship bracelet.
What You’ll Need:
- Embroidery floss in three different colors
- Scissors
- Tape
Step-by-Step Instructions:
- Cut Your Strings: Cut one piece of each of your three colors, each about two feet long.
- Tie a Knot: Hold all three strings together and tie a knot at one end, leaving a little tail. Tape this knotted end to a table to hold it in place.
- The First Knot: Separate your strings. Take the string on the very left and cross it over the middle string, making a “4” shape.
- Loop and Pull: Now, loop that left string under the middle string and pull it up tight. You’ve made a knot! Do this one more time with the same two strings.
- Keep Going: Now your left string has moved to the middle. Take the string that is now on the far right. Cross it over the new middle string and make two knots. Keep repeating this pattern, always taking the string on the outside and knotting it twice over the string in the middle. Soon you will have a beautiful woven bracelet!
8. The Heirloom Patchwork Quilt

This quilt feels like a collection of cherished memories. Made from many small squares of fabric, it has a classic, handmade charm. The soft, faded colors of blue, pink, and green on a creamy white background give it a gentle, vintage feel.
The careful stitching that runs all over the quilt creates a soft, puffy texture. This is a blanket with history and heart. It adds a touch of country comfort and a feeling of family tradition to a simple, elegant bedroom.
DIY No-Sew Fabric Bookmark
You can make a beautiful bookmark using your favorite fabric scraps.
What You’ll Need:
- A piece of stiff cardstock, cut to the size of a bookmark
- A few pretty scraps of fabric
- A glue stick
- Scissors
Step-by-Step Instructions:
- Cut Your Scraps: Cut your fabric scraps into small squares and rectangles, just like a tiny quilt.
- Create Your Design: Arrange your fabric pieces on your cardstock bookmark. You can make stripes, a checkerboard pattern, or just place them randomly. Move them around until you like how they look.
- Glue Them Down: One by one, pick up your fabric pieces, put glue on the back with your glue stick, and press them firmly onto the cardstock. Make sure the edges of the fabric touch.
- Cover the Whole Thing: Keep going until your entire bookmark is covered in your fabric patchwork.
- Trim the Edges: Once the glue is dry, flip the bookmark over. You will see some fabric hanging over the sides. Use your scissors to carefully trim the extra fabric off, using the cardstock as your guide. You can punch a hole in the top and add a yarn tassel if you want!
9. The Arctic Fox Faux Fur Throw

This throw is the ultimate in plush, luxurious comfort. The faux fur is incredibly thick and soft, with a realistic mix of white, grey, and black tones that mimic the look of an arctic fox. It looks unbelievably warm and inviting.
The reverse side is a smooth, solid grey fleece, offering a different kind of softness. This is a heavy, dramatic blanket that you can truly sink into. It brings a feeling of wild, glamorous warmth to a modern living room.
DIY Faux Fur Pom-Pom Keychain
You can make a soft and stylish pom-pom to hang on your backpack.
What You’ll Need:
- A small piece of faux fur fabric
- A needle and strong thread
- A handful of cotton balls for stuffing
- Scissors
- A keychain ring
Step-by-Step Instructions:
- Cut Your Circle: On the flat, non-furry back of your fabric, draw a circle about 5 inches across. Carefully cut it out. When you cut, try to only cut the backing so you don’t chop the fur short.
- Sew a Running Stitch: Thread your needle. Sew a simple “in and out” stitch all the way around the very edge of your fabric circle. Don’t tie a knot at the end yet!
- Make a Pouch: Gently pull on your thread. The fabric circle will start to gather up and form a little pouch.
- Stuff It: Before you pull it all the way closed, stuff a few cotton balls inside to make your pom-pom nice and round.
- Close It Up: Pull the thread tight to close the pouch completely. Stitch it shut with a few extra stitches and tie a secure knot. Use the extra thread to tie your new, fluffy pom-pom onto a keychain ring.
10. The Ribbed Knit Throw

These throws have a clean, modern look but are full of cozy texture. The deep, vertical ribs create a beautiful pattern of lines and shadows. The knit looks soft and has a nice, comforting stretch to it.
Shown in a trio of classic colors—a versatile grey, a calming olive green, and a deep navy blue—they are perfect for layering. You can toss one over the arm of a sofa for a simple accent or pile them all on for extra warmth. They are simple, stylish, and very inviting.
DIY Finger-Knitting a Snake
You can knit using just your fingers to create a long, ribbed cord.
What You’ll Need:
- Yarn in any color
- Your own two fingers!
Step-by-Step Instructions:
- The First Loop: Drape the end of the yarn over your pointer finger and hold the tail with your thumb.
- Weave a “Figure 8”: Weave the yarn behind your middle finger, then in front of it. Then weave it behind your pointer finger. Do this “figure 8” motion one more time, so you have two loops on each finger.
- The First Stitch: This is the tricky part! On your pointer finger, take the bottom loop and lift it up and over the top loop, and over your fingertip. Let it go. Do the same thing on your middle finger. You’ve just “knitted” two stitches!
- Weave and Knit: Weave another “figure 8” around your fingers. You should have two loops on each finger again. Then, repeat Step 3, always lifting the bottom loop over the top loop.
- Watch It Grow: Keep going! Soon you will see a long, knitted cord growing out of the back of your fingers. When it’s as long as you want, carefully lift the loops off your fingers and thread the yarn tail through them to tie a knot.
11. The Golden Hour Mohair Throw

This throw radiates warmth with its brilliant marigold hue. The light, airy texture of mohair gives it a gentle, fuzzy halo that looks incredibly soft to the touch. It seems to capture the warm light of a late afternoon sun, glowing from within.
Draped gracefully over a classic wooden armchair, its simple elegance is clear. A long, delicate fringe completes the look, adding a touch of handcrafted charm. This blanket brings a vibrant splash of color and a feeling of soft luxury to a quiet corner.
DIY Yarn Wall Hanging
You can make a beautiful piece of art for your wall using yarn and a stick from your yard.
What You’ll Need:
- A clean, interesting-looking stick or a wooden dowel
- Several colors of yarn
- Scissors
Step-by-Step Instructions:
- Cut Your Yarn: Cut lots of pieces of yarn, each one twice as long as you want your wall hanging to be. Don’t worry about making them all the exact same length. Mix up the colors!
- The First Knot (Lark’s Head Knot): Take one piece of yarn and fold it in half to make a loop at one end. Place this loop over your stick.
- Pull It Through: Now, take the two dangly ends of the yarn and pull them through the loop. Pull it snug against the stick. You’ve just attached your first piece of yarn!
- Fill the Stick: Keep adding more yarn pieces using the same knot. You can group colors together to make stripes or mix them all up for a fun look. Fill up as much of the stick as you like.
- Give It a Haircut: Once you’re done, you can trim the bottom of the yarn. You can cut it straight across, in a V-shape, or at an angle to make it your own. To hang it, just tie another piece of yarn to both ends of the stick.
12. The English Garden Armchair Cover

This charming armchair cover transforms a simple chair into a romantic garden seat. The creamy background is adorned with a classic floral pattern of rambling roses and blue blossoms. It brings a feeling of a gentle, sunlit garden indoors.
A delicate ruffled edge with lace trim adds to its vintage appeal. This isn’t just a throw; it’s a way to give furniture a new personality. It invites you to sit with a cup of tea and a good book, surrounded by the beauty of a timeless English cottage.
DIY No-Sew Fabric Covered Notebook
Give a plain notebook a beautiful new look with your favorite fabric.
What You’ll Need:
- A plain, hardcover notebook
- A piece of cotton fabric, about 2 inches bigger than your open notebook on all sides
- Strong craft glue or a hot glue gun
- Scissors
Step-by-Step Instructions:
- Cut Your Fabric: Open your notebook and lay it flat on your piece of fabric. Cut the fabric so there is a two-inch border all the way around the notebook.
- Glue the Spine: Close the notebook. Put a line of glue down the spine of the notebook and press it firmly onto the center of your fabric.
- Glue the Covers: Open the front cover. Cover the entire outside of the front cover with a thin layer of glue. Smooth the fabric over it, getting rid of any bubbles. Do the same for the back cover.
- Trim the Corners: At each corner, cut a little triangle out of the fabric. This will help the corners fold neatly.
- Fold and Glue the Edges: Put glue on the inside flap of the notebook cover. Fold the extra fabric from the top, bottom, and side over the edge of the cover and press it into the glue. Do this for all the edges on the front and back covers. Let it dry, and you have a beautiful new journal!
13. The Metro Grid Knit Throw

This throw has a bold, modern edge. The clean, graphic pattern of a windowpane grid in black, white, and grey feels sharp and architectural. It is a statement of minimalist style, bringing order and structure to a soft textile.
Despite its sharp lines, the blanket itself is a soft knit, offering warmth and comfort. A finely stitched edge completes the high-quality look. This piece is a great fit for a contemporary space, proving that cozy can also be clean, cool, and sophisticated.
DIY Grid Pattern Tote Bag
You can give a plain canvas bag a modern look with just a ruler and a marker.
What You’ll Need:
- A plain canvas tote bag
- A ruler
- A black permanent fabric marker
- A piece of cardboard to put inside the bag
Step-by-Step Instructions:
- Prepare Your Bag: Place the piece of cardboard inside your tote bag. This will make the surface flat and stop the marker from bleeding through to the other side.
- Draw the Vertical Lines: Lay your ruler vertically (up and down) on the bag. Use your fabric marker to draw a straight line from the top to the bottom.
- Continue the Pattern: Move your ruler over about two inches and draw another line parallel to the first one. Keep doing this until you have vertical stripes all the way across the bag.
- Draw the Horizontal Lines: Now, turn your ruler horizontally (side to side). Draw a straight line from one side of the bag to the other.
- Finish the Grid: Move your ruler down about two inches and draw another horizontal line. Keep going until you have lines all the way down the bag. You’ve created a cool, modern grid pattern! Let the marker dry completely before you use it.
14. The Winter Birch Sherpa Throw

This blanket brings the quiet beauty of a winter forest into your home. The smooth top side features a realistic print of white birch trees against a calm blue sky. It’s a peaceful, natural scene that feels both crisp and serene.
The reverse side is a thick, fluffy white sherpa fleece, as soft and white as freshly fallen snow. This throw offers the best of both worlds: a beautiful view and incredible warmth. It’s a wonderful way to snuggle up with a piece of the great outdoors.
DIY Nature Rubbing Art
Create beautiful pictures of leaves and bark using paper and crayons.
What You’ll Need:
- A few interesting leaves or a piece of tree bark
- Plain white paper
- Crayons with the paper peeled off
Step-by-Step Instructions:
- Find Your Texture: Go outside and find some cool leaves. Look for ones that have lots of veins. You can also do this with a piece of interesting bark from a fallen branch.
- Place Your Leaf: Put your leaf on a hard, flat surface like a table or the floor. Place a single sheet of white paper on top of it.
- Hold It Steady: Hold the paper firmly with one hand so it doesn’t wiggle around.
- Start Rubbing: Take a crayon and turn it on its side. Gently rub the side of the crayon back and forth over the area where the leaf is hiding under the paper.
- Watch the Magic: As you rub, the pattern of the leaf’s veins will magically appear on your paper! You can do this with different leaves and colors to create a whole forest of pictures.
15. The Parisian Bouclé Fringe Throw

This throw is the essence of effortless chic. The nubby, looped texture of bouclé yarn gives it a wonderfully tactile and sophisticated feel. Soft stripes of dusty pink and cream are accented by threads of black, creating a classic and fashionable look.
A long, thick fringe in a gentle blush tone adds a final touch of elegance and weight. Casually draped over a modern armchair, it looks both luxurious and inviting. It’s a piece that adds texture, warmth, and a hint of high-fashion sensibility to your living space.
DIY Woven Coaster on Cardboard
You can weave your own little coaster using yarn and a piece of cardboard.
What You’ll Need:
- A stiff piece of cardboard, about 5×5 inches
- Yarn in a few different colors
- A ruler
- A pencil
- Scissors
- A large plastic needle (or you can just use your fingers)
Step-by-Step Instructions:
- Make Your Loom: On your cardboard, use a ruler and pencil to draw marks at the top and bottom, about a quarter-inch apart. Use scissors to make a small snip on each mark.
- Warp the Loom: Take your first color of yarn. Tuck the end into the first snip at the top. Bring the yarn down to the first snip at the bottom, then loop it around the back and up to the second snip at the top. Keep wrapping the yarn up and down until all the snips are filled. These are your “warp” threads.
- Start Weaving: Cut a long piece of a different colored yarn (your “weft”). Weave it over the first warp thread, under the second, over the third, and so on, all the way across.
- Weave Back: On the next row, do the opposite. Go under the threads you went over, and over the ones you went under. Use your fingers to push the rows of yarn together tightly.
- Finish It Off: Keep weaving, changing colors whenever you want, until you reach the end. To finish, carefully cut the warp loops off the cardboard at the top and bottom. Tie the loose loops together in pairs to make sure your weaving doesn’t unravel.
16. The Classic Waffle Weave Throw

These throws are a staple of comfortable living. The deep, textured pockets of the waffle weave create a blanket that is both wonderfully breathable and surprisingly warm. The pattern is simple, timeless, and feels great to the touch.
Shown here in a trio of rich, earthy colors—creamy ivory, warm terra-cotta, and deep navy—they are made for layering. You can use one on its own during a cool evening or pile them on the bed for extra warmth in the winter. They are versatile, durable, and effortlessly stylish.
DIY Paper Weaving Placemat
Learn the basics of weaving by making a colorful placemat out of paper.
What You’ll Need:
- Two different colored sheets of construction paper (like one blue, one yellow)
- A ruler
- A pencil
- Scissors
Step-by-Step Instructions:
- Prepare the Base: Take the blue sheet of paper. Fold it in half the long way (like a hot dog bun). Starting from the folded edge, use your ruler and pencil to draw straight lines about one inch apart. Stop drawing about one inch from the open edges.
- Cut the Slits: Keep the paper folded. Carefully cut along the lines you drew, stopping before you get to the edge. When you open the paper, you should have a sheet with long slits down the middle. This is your “loom.”
- Make Your Strips: Take the yellow sheet of paper. Use your ruler and pencil to draw straight lines across the paper, about one inch apart. Cut along these lines to make a bunch of yellow paper strips.
- Start Weaving: Take your first yellow strip. Weave it over the first blue strip of your loom, then under the second, over the third, and so on, all the way across.
- Weave the Next Strip: Take a second yellow strip. This time, do the opposite. Weave it under the first blue strip, over the second, and so on. Keep going with all your strips until your placemat is full! You can glue the ends down if you like.
17. The Gilded Damask Woven Throw

This throw is pure opulence. The intricate, swirling floral pattern is woven directly into the fabric, creating a rich texture full of depth and detail. Hues of black, silver, and muted gold give it a look of antique luxury and formal elegance.
This is a heavy, substantial blanket, with a weight that feels comforting and secure. A thick, multi-toned fringe completes the sophisticated design. Placed on a dark sofa, it becomes a stunning centerpiece, adding a dramatic and artful touch to a refined room.
DIY Stenciled Canvas Pouch
You can create fancy patterns on fabric using a stencil and some paint.
What You’ll Need:
- A plain canvas pencil pouch or small bag
- A stencil with a pattern you like (you can find these at a craft store)
- Acrylic craft paint
- A small sponge or a stencil brush
- A paper plate
- Masking tape
Step-by-Step Instructions:
- Position Your Stencil: Place your stencil onto the canvas pouch exactly where you want the pattern to be. Use a few small pieces of masking tape to hold it in place so it doesn’t move.
- Get Your Paint Ready: Squeeze a little bit of paint onto your paper plate.
- Start Dabbing: Dip the tip of your sponge or stencil brush into the paint. Dab most of it off on the plate—you only want a little bit of paint on your brush. This is the secret to clean lines!
- Fill In the Stencil: Gently dab the paint over the open parts of your stencil. Use an up-and-down motion instead of a brushing motion. Cover all the parts of the design you want to paint.
- The Big Reveal: Carefully peel the stencil off the pouch. Let the paint dry completely. You’ve just made a beautiful, patterned design!
18. The Farmhouse Stripe Throw

This throw has a simple, honest charm. The background is a natural, unbleached cotton color, giving it a rustic and wholesome feel. Three sets of clean, classic stripes—in faded red, denim blue, and charcoal grey—run down its length.
The design is inspired by old-fashioned grain sacks, bringing a touch of farmhouse history into the modern home. A simple stitched edge keeps the look clean and unfussy. It is a light, versatile blanket, great for tossing over the end of a bed or taking on a picnic.
DIY Stamped Tea Towel
Create your own patterned kitchen towel using a potato!
What You’ll Need:
- A plain cotton tea towel or napkin
- A potato
- A knife (ask a grown-up for help with this part)
- A paper plate
- Fabric paint
Step-by-Step Instructions:
- Make Your Stamp: Ask a grown-up to help you cut a potato in half. Then, they can help you carefully carve a simple shape into the flat side of the potato, like a star or a simple stripe.
- Prepare Your Paint: Squeeze some fabric paint onto a paper plate and spread it out into a thin layer.
- Ink Your Stamp: Press the flat, carved side of your potato stamp into the paint. Make sure it’s evenly coated.
- Start Stamping: Press your potato stamp firmly down onto your tea towel. Lift it straight up to see your design!
- Create Your Pattern: You can make rows of your shape, or stamp them randomly all over the towel. When you’re done, let the paint dry completely. Follow the instructions on the paint bottle, as you might need a grown-up to iron it to set the design.
19. The Rainbow Burst Knit Blanket

This blanket is an explosion of pure joy. Bright, vibrant colors blend into one another in a beautiful tie-dye effect, moving through the entire spectrum of the rainbow. It is energetic, fun, and impossible to ignore.
The chunky knit texture adds to its playful character, making the colors pop even more. This isn’t just a blanket for warmth; it’s a mood-booster. It is a bold and cheerful statement piece that can bring life and happiness to even the simplest chair.
DIY Sharpie Tie-Dye Coaster
Create a cool tie-dye look on a tile with markers and rubbing alcohol.
What You’ll Need:
- A plain, shiny ceramic tile (from a hardware store)
- Several different colored Sharpie markers
- Rubbing alcohol (the higher the percentage, the better)
- A small dropper or a straw
- A can of clear sealant spray (for a grown-up to use)
Step-by-Step Instructions:
- Color Your Tile: Use your Sharpie markers to scribble blocks of color all over the shiny side of your tile. You don’t have to draw a picture, just make colorful splotches next to each other.
- Prepare the Magic Potion: Put a little bit of rubbing alcohol in a small cup.
- Watch the Colors Run: Use your dropper (or dip the end of a straw) to pick up a little alcohol. Drop single drops of alcohol onto the colored tile.
- The Magic Happens: Watch as the alcohol makes the Sharpie ink spread out and blend together, creating a beautiful tie-dye pattern! Keep adding drops until you like how it looks.
- Seal It: Let the tile dry completely. Ask a grown-up to take it outside and spray it with a clear sealant to protect the design. Now you have a vibrant, waterproof coaster!
20. The Cashmere Plaid Fringe Throw

This throw is a study in quiet elegance. The classic plaid pattern is rendered in a sophisticated palette of neutral tones: warm camel, soft grey, and creamy off-white. This timeless design feels both traditional and completely modern.
The fabric looks exceptionally soft, like fine cashmere or merino wool, promising a gentle and luxurious warmth. A long, twisted fringe provides a classic finish. This is a refined and versatile piece, equally at home in a formal living room or draped over your shoulders on a cool evening.
DIY No-Sew Fringed Scarf
You can make a cozy fleece scarf in just a few minutes, with no sewing needed!
What You’ll Need:
- A piece of fleece fabric (about 10 inches wide and 60 inches long)
- A ruler
- Sharp scissors
Step-by-Step Instructions:
- Cut Your Fabric: If your fleece isn’t already the right size, use your ruler and scissors to cut a long rectangle. A good size for a scarf is about 10 inches wide and as long as you are tall!
- Time to Make the Fringe: Lay one of the short ends of your scarf flat.
- Start Snipping: Using your scissors, make cuts into the fabric about 4 inches deep. Make each cut about half an inch apart.
- Keep Going: Continue making these cuts all the way across the short end of the scarf.
- Do the Other Side: Now, go to the other short end of your scarf and do the exact same thing. That’s it! You’ve just made your own warm, fringed scarf.
21. The Icelandic Sheepskin Throw

This throw is pure natural texture. The long, soft wool has a wild and untamed look, with a beautiful gradient of color from deep charcoal to soft grey and bright ivory. It is less of a blanket and more of a luxurious, tactile layer.
Draped over a modern chair, it adds an instant touch of rustic warmth and sophisticated style. This piece is all about the feeling of the raw, plush wool against your skin. It brings an element of nature indoors in a very elegant way.
DIY Faux Fur Coasters
You can add a little bit of this cozy texture to your tabletop with these easy, no-sew coasters.
What You’ll Need:
- A small piece of faux fur fabric
- A square of stiff felt for the back
- A pen
- A cup or round object to trace
- Sharp scissors
- Fabric glue
Step-by-Step Instructions:
- Trace Your Circles: Turn your faux fur over so the flat backing is facing up. Place your cup on the backing and trace a circle with your pen. Do the same thing on the felt.
- Cut Them Out: Carefully cut out the faux fur circle and the felt circle. When cutting the fur, try to only cut the backing fabric to keep the fur on the other side long and fluffy.
- Glue Them Together: Take your felt circle and put a thin layer of fabric glue on one side.
- Press and Dry: Place the back of your faux fur circle onto the glue-covered felt circle. Press them together firmly.
- Let it Set: Place a heavy book on top of your new coaster for about an hour to make sure it dries flat and the glue holds strong. Make a few more for a complete set!
22. The Sunrise Gradient Cashmere Throw

This throw is as gentle as the dawn sky. The fine, lightweight knit drapes with an airy elegance, displaying a beautiful and seamless transition of color. It moves from a soft sky blue, through a creamy white, into a delicate blush pink.
The effect is incredibly serene and calming. This isn’t a heavy blanket, but a whisper-soft layer of warmth, made for wrapping around your shoulders on a cool morning. It adds a touch of subtle color and incredible softness to a room.
DIY Watercolor Painted Card
You can create this beautiful blended-color effect yourself with some watercolors.
What You’ll Need:
- A piece of thick white paper or watercolor paper
- Watercolor paints
- A paintbrush
- A small cup of water
Step-by-Step Instructions:
- Get Your Paper Wet: With your paintbrush, paint a clear layer of plain water across the top half of your paper. This helps the colors blend together smoothly.
- Add the First Color: Dip your brush in a color like blue. Gently touch the brush to the top of the wet paper. Watch how the color magically spreads out! Paint across the top part of the wet area.
- Clean Your Brush and Add the Second Color: Rinse your brush in the water. Now, dip it into another color, like pink or yellow. Start painting from the bottom of the wet area, moving up towards the blue.
- Blend in the Middle: Where the two colors meet, they will softly blend together, creating a beautiful gradient. You can tilt the paper to help them mix.
- Let It Dry: Set your masterpiece aside to dry completely. You can fold it in half to make a card or frame it as a piece of art.
23. The Giant’s Knit Merino Blanket

This blanket is comfort on a massive scale. The yarn is incredibly thick, creating huge, pillowy stitches that you can sink into. It has an amazing visual and textural weight, making a dramatic and cozy statement at the foot of a bed.
The soft grey merino wool is exceptionally soft and warm. Being wrapped in this is a unique experience, like getting a gentle hug from a friendly cloud. It is the ultimate piece for luxurious lounging and a true conversation starter.
DIY Arm Knitting a Scarf
You can make your own chunky-knit creation using your arms as the knitting needles!
What You’ll Need:
- One skein of super chunky, jumbo yarn
Step-by-Step Instructions:
- The First Stitch (Cast On): Make a slip knot and place it on your right wrist. With the yarn coming from the ball, make a loop and pull it through to create another stitch. Put this new loop on your right wrist. Repeat until you have about 10 loops, or “stitches,” on your right arm.
- The First Row: Hold the working yarn (the string coming from the ball) in your right hand. Take the first stitch on your right wrist, lift it up and over your hand, and drop it off. You just moved a stitch! Now, with your left hand, pull the working yarn to create a new loop and place that on your left wrist.
- Keep Going: Repeat this for all the stitches on your right arm. When you’re done, all your stitches will have moved from your right arm to your left arm.
- Knit Back: Now, just do the same thing in the other direction, moving the stitches from your left arm to your right arm.
- Finishing: Keep knitting back and forth until your scarf is the length you want. To finish, knit two stitches, then lift the first one over the second one. Knit one more, and lift the older one over the new one. Repeat until you have one loop left, cut the yarn, and pull it through the last loop to tie a knot.
24. The Nomad’s Kilim Woven Throw

This piece is rich with story and tradition. The flat-woven kilim style features bold, geometric patterns that feel both ancient and timeless. A warm palette of deep red, earthy brown, and pops of yellow and blue creates a vibrant and grounded look.
This is a heavy, durable textile, making it wonderfully versatile. You can use it as a statement throw, a vibrant rug, or even a stunning piece of wall art. It brings a sense of worldly travel and handcrafted artistry into your home.
DIY Woven Bookmark with Cardboard Loom
You can try this style of weaving by making a colorful bookmark.
What You’ll Need:
- A piece of stiff cardboard (about 3 inches wide and 8 inches long)
- Thin yarn or embroidery floss in several colors
- Scissors
- A ruler and pencil
Step-by-Step Instructions:
- Make Your Loom: On your cardboard, make small snips at the top and bottom, about a quarter-inch apart.
- Warp the Loom: Wrap your first color of yarn up and down the cardboard loom, fitting it into the snips to create your vertical “warp” threads.
- Start Weaving: Take a different color yarn (your “weft”). Weave it over and under the warp threads, from one side to the other.
- Create Shapes: To make a triangle or diamond shape like in the kilim, don’t weave all the way across. Weave back and forth in a smaller section, adding one more warp thread to each row to make the shape grow wider. Then, weave on one less thread each row to make it smaller again.
- Finish It: When your bookmark is the length you want, cut the warp threads from the back of the loom. Tie them together in pairs at the top and bottom to create a little fringe and keep your weaving from coming undone.
25. The Scholar’s Herringbone Wool Throw

This throw speaks of classic style and quiet afternoons. The timeless herringbone pattern, with its subtle zig-zag weave, adds a touch of texture and sophistication. The earthy, olive green color is handsome and distinguished, a nice complement to a leather armchair.
Made from a quality wool, it offers substantial warmth without being bulky. A simple, twisted fringe finishes the edges cleanly. This is the kind of dependable, elegant blanket you would find in a cozy library or a quiet study.
DIY Paper Herringbone Bookmark
You can create this classic pattern with a simple paper-folding craft.
What You’ll Need:
- A piece of cardstock for the bookmark base (about 2×6 inches)
- Two different colors of construction paper
- A ruler
- Scissors
- A glue stick
Step-by-Step Instructions:
- Cut Your Strips: From both colors of construction paper, cut several long strips that are half an inch wide.
- Make the First “V”: Take one strip of each color. Glue them together at the end to form a right angle, or an “L” shape.
- Start the Pattern: Glue this first V-shape onto the top corner of your cardstock bookmark.
- Build the Zig-Zag: Now, take another strip of the first color. Glue it right next to the first strip of that same color, creating a parallel line. Do the same with the second color. You will start to see the zig-zag pattern form.
- Fill the Bookmark: Keep adding strips, alternating colors and keeping them snug against each other, until you have covered the whole bookmark.
- Trim the Edges: Flip the bookmark over. You will see lots of extra paper hanging over the sides. Use your scissors to trim all the extra paper off, following the shape of the cardstock.
26. The Marshmallow Fleece Throw

These throws are the definition of plush comfort. The fabric has a unique, slightly curly texture that is incredibly soft and inviting, much like a fluffy marshmallow. They look so soft you can almost feel them through the screen.
Shown in gentle, soothing colors of seafoam green and heather grey, these blankets are made for serious snuggling. They are lightweight yet warm, and their generous size is great for draping over a whole sofa. This is pure, uncomplicated coziness.
DIY No-Sew Fleece Hand Warmers
Create little pockets of warmth for your hands using the same soft fleece.
What You’ll Need:
- A small piece of fleece fabric
- Sharp scissors
- A small bowl of uncooked rice
- A pen
Step-by-Step Instructions:
- Cut Your Shapes: Take your piece of fleece and fold it in half. Draw a simple shape on it, like a heart or a square, about 4 inches wide.
- Cut It Out: While the fleece is still folded, carefully cut out your shape. You should now have two identical pieces of fleece.
- Make the Fringe: Lay the two shapes on top of each other, making sure they line up. Around the entire edge of the shapes, make little snips about half an inch deep and half an inch apart. Cut through both layers at the same time.
- Start Tying: Take the top and bottom fringe pieces and tie them together in a tight double knot. Continue tying the fringe pieces together all the way around, but leave a small opening of about three or four untied fringes.
- Fill with Rice: Carefully pour some rice into the small opening until your hand warmer is about two-thirds full.
- Tie It Shut: Tie the remaining fringe pieces together to seal the opening. To warm it up, have a grown-up heat it in the microwave for about 20-30 seconds.
27. The Winter Garden Holly Throw

This throw brings a dramatic, festive beauty to the holiday season. The dark black background makes the botanical print truly stand out. Bright red holly berries, crisp grey leaves, and winter-blooming hellebore flowers create a pattern that is both elegant and full of life.
The design is artistic and sophisticated, a departure from more common holiday themes. It’s a wonderful way to add a touch of seasonal spirit to your living room in a stylish, grown-up way. This is a blanket that is also a piece of art.
DIY Pressed Leaf Art
You can preserve the beauty of nature by pressing leaves and flowers.
What You’ll Need:
- A few interesting leaves or flat flowers from your yard
- A very heavy book (like a phone book or dictionary)
- Two pieces of paper towel or wax paper
- A picture frame
Step-by-Step Instructions:
- Collect Your Leaves: Find some leaves that are flat and not too thick. Flowers with a single layer of petals, like pansies, also work well.
- Make a Leaf Sandwich: Open your heavy book to the middle. Lay down a piece of paper towel. Arrange your leaves on the paper towel, making sure they don’t overlap. Place another paper towel on top.
- Press It: Carefully close the heavy book. The weight of the pages will press your leaves flat.
- Be Patient: Leave the book in a safe place for about two to three weeks. This gives the leaves time to dry out completely.
- Create Your Art: After a few weeks, carefully open the book and take out your beautifully preserved, paper-thin leaves. You can arrange them on a nice piece of paper and put them in a picture frame to display.
28. The Rainbow Pom-Pom Play Mat

This blanket is pure, unfiltered fun. A simple, textured grey knit forms the center, but the real party is on the border. Huge, fluffy pom-poms in every color of the rainbow line the entire edge, creating a playful and irresistible look.
Each pom-pom is a burst of cheerful color. This piece is perfect for a child’s room or any space that could use a dose of happiness. It’s a blanket that doesn’t take itself too seriously and invites you to smile.
DIY Yarn Pom-Pom with a Fork
You can make your own fluffy pom-poms using a regular dinner fork!
What You’ll Need:
- A fork
- Yarn (any color!)
- Sharp scissors
Step-by-Step Instructions:
- Start Wrapping: Hold the end of the yarn against the fork handle. Start wrapping the yarn around the tines (the pointy parts) of the fork. Go around and around about 50 times. The more you wrap, the fluffier your pom-pom will be.
- Tie the Middle: Cut a new piece of yarn about 6 inches long. Slide this piece through the middle tine of the fork, so it goes right through the center of your yarn bundle. Pull both ends up and tie a very tight double knot.
- Slide It Off: Gently slide the whole yarn bundle off the fork.
- The Big Snip: You will see loops on both sides of the knot you just tied. Take your scissors and carefully snip through all of the loops.
- Fluff and Trim: It will look a bit messy at first. Roll the pom-pom in your hands to fluff it up. Use your scissors to give it a little haircut, trimming any long or uneven strands until you have a nice, round ball of fluff.
29. The Captain’s Nautical Fleece

This throw is clean, sharp, and practical. The deep navy blue fleece has a classic, maritime feel. It is reversible, with a handsome charcoal grey on the other side, and finished with a neat blanket stitch around the edge.
The most clever detail is the corner pocket. Decorated with olive and grey stripes and a small embroidered anchor, it’s a handy place to tuck your phone or a small book. This is a functional and thoughtfully designed blanket, great for a boat, a dorm room, or any tidy space.
DIY No-Sew T-Shirt Pocket
You can add a useful pocket to a plain t-shirt or a bag using this simple trick.
What You’ll Need:
- A plain t-shirt or canvas bag
- A small piece of contrasting fabric for the pocket
- A sheet of iron-on hem tape (fusible web)
- An iron (ask a grown-up for help)
- Scissors
Step-by-Step Instructions:
- Cut Your Pocket: Cut your pocket fabric into a square or rectangle shape. A good size is about 5×5 inches.
- Prepare the Edges: On the top edge of your pocket, fold the fabric down about half an inch and ask a grown-up to help you iron it flat. This makes a clean top edge.
- Apply the Tape: Cut strips of the iron-on hem tape and place them along the other three edges of your pocket (the back, flat side).
- Position the Pocket: Decide exactly where you want your pocket to go on your t-shirt. Place it there, with the hem tape side down against the shirt.
- Iron It On: Ask a grown-up to press the hot iron onto the pocket for about 10-15 seconds. The heat will melt the glue in the tape and stick your pocket firmly to the shirt. Let it cool down, and your new pocket is ready to use!
30. The Jewel-Toned Crushed Velvet Throw

These throws are all about rich, touchable luxury. The crushed velvet fabric has a beautiful luster that catches the light from every angle, making the colors look deep and vibrant. This texture is incredibly soft and smooth.
Shown in a trio of opulent jewel tones—a royal purple, a deep ruby red, and a shimmering silver—these blankets add a dose of glamour to any sofa. They are perfect for creating a moody, sophisticated, and very comfortable atmosphere in your living room.
DIY Velvet Covered Hair Scrunchie
You can make your own stylish velvet scrunchie with just a little bit of sewing.
What You’ll Need:
- A strip of velvet fabric (about 4 inches wide and 20 inches long)
- A piece of elastic (about 8 inches long)
- A needle and thread
- A safety pin
- Scissors
Step-by-Step Instructions:
- Make a Tube: Fold your velvet strip in half the long way, with the soft, pretty sides facing each other. Using your needle and thread, sew a straight line of stitches all the way down the long, open edge. You’ve just made a fabric tube.
- Turn It Right-Side-Out: Turn your fabric tube right-side-out. This can be tricky, but be patient! Now the soft velvet is on the outside.
- Thread the Elastic: Attach a safety pin to one end of your piece of elastic. Use the safety pin to help you push and pull the elastic all the way through your fabric tube.
- Tie the Elastic: Hold onto both ends of the elastic so you don’t lose them! Tie the two ends together in a very tight double knot. This will make your scrunchie stretchy.
- Close the Opening: Tuck the raw edge of one opening inside the other opening just a little bit. Carefully sew the opening shut with a few small, neat stitches. Your luxurious velvet scrunchie is ready!
31. The Carnival Rag Weave Throw

This throw is a joyful jumble of color and texture. Crafted from countless strips of recycled fabrics, it has a wonderfully nubby and substantial feel. Every inch is a riot of different hues—bright yellows, deep reds, vibrant blues, and cheerful pinks—all woven together.
There’s a beautiful, unrefined energy to this piece. It feels handmade with spirit and a love for color. A short, rustic fringe completes the look. This is a blanket that brings an undeniable sense of happiness and bohemian charm to a room.
DIY No-Sew Rag Rug Coaster
You can create this woven look using old t-shirts and a piece of cardboard.
What You’ll Need:
- An old t-shirt you no longer need
- A stiff piece of cardboard (about 5×5 inches)
- Scissors
Step-by-Step Instructions:
- Make Your Loom: Cut your cardboard into a circle. Then, make an odd number of small snips (like 11 or 13) evenly spaced around the edge. Cut a small X in the very center.
- Make “T-shirt Yarn”: Cut your t-shirt into one long, continuous strip about one inch wide. You can do this by cutting in a spiral. Roll it into a ball.
- Warp Your Loom: Tuck the end of your t-shirt yarn into one of the snips. Stretch the yarn across the circle to the snip directly opposite. Loop it and bring it back to the snip next to where you started. Continue until you have lines crossing through the center, like a bicycle wheel. Tuck the starting end through the X in the middle.
- Start Weaving: Take the long end of your yarn and start weaving it over and under the “spokes” of your loom, going around in a circle.
- Finish It: Keep weaving until your coaster is the size you want. Snip the yarn, leaving a small tail. Tuck the tail securely under some of the woven loops on the back. Carefully pop the loops off the cardboard edges.
32. The Sweater-Blanket Cocoon

This is the ultimate evolution of cozy. It combines the comforting weight of a cable-knit blanket with the practical design of a favorite cardigan. Deeply textured and wonderfully thick, it drapes over you with an unmatched feeling of warmth.
The clever, wearable design means you can wrap yourself in its warmth while keeping your hands free for a book or a warm drink. Color-blocked in soothing cream, grey, and navy, it’s both stylish and incredibly functional. It’s your personal cocoon against the cold.
DIY Yarn Tassel Bookmark
Create a simple, beautiful tassel that you can use as a bookmark or to decorate a keychain.
What You’ll Need:
- Yarn in your favorite color
- A small piece of cardboard (about 3 inches tall)
- Sharp scissors
Step-by-Step Instructions:
- Wrap the Yarn: Hold the end of the yarn against the cardboard. Wrap the yarn around the cardboard about 30 times. The more you wrap, the thicker your tassel will be.
- Tie the Top: Cut a new piece of yarn. Slide it underneath all the wrapped yarn at the top of the cardboard and tie a very tight knot. Don’t trim the ends of this piece; you’ll use it for your bookmark.
- Cut the Bottom: Slide your scissors into the loops at the bottom of the cardboard and snip all the way through.
- Make the Neck: Cut another piece of yarn. Wrap it tightly around your tassel bundle, about half an inch from the top knot, to create the tassel’s little “head.” Tie a secure knot and trim the short ends.
- Final Trim: Give the bottom of your tassel a little haircut to make sure all the strands are even. You can now use the long strings at the top to tie it to a paperclip or use it as is for a bookmark.
33. The Calming Weighted Embrace Blanket

This blanket does more than just warm you; it comforts you. Designed to be heavier than a standard blanket, it provides a gentle, even pressure across your body. The effect is often described as feeling like a long, secure hug, which can help calm the mind and body.
The quilted channels keep the weighted filling evenly distributed. This one features a smooth, cool fleece on one side and different textures on the other, including a soft sherpa and a bumpy minky dot fabric. It’s a tool for relaxation that is also wonderfully cozy.
DIY Calming “I-Spy” Bottle
Create a fun sensory toy that can help you feel calm and focused.
What You’ll Need:
- A clear plastic bottle with a secure lid (a water bottle works well)
- Enough uncooked rice to fill the bottle about three-quarters full
- A collection of small trinkets (like a paperclip, a button, a small bead, a rubber band, a penny)
- A funnel (or a rolled-up piece of paper)
- Strong glue (like a hot glue gun, for a grown-up to use)
Step-by-Step Instructions:
- Fill with Rice: Use your funnel to pour rice into the bottle until it’s about half full.
- Add Your Treasures: Drop your small trinkets into the bottle one by one.
- Top It Off: Add more rice until the bottle is about three-quarters full. You need to leave some space so things can move around.
- Seal It Tight: This is a step for a grown-up! Put a line of strong glue around the inside of the bottle cap and screw it on tightly. This makes sure nothing can spill out.
- Play I-Spy: Once the glue is dry, you can shake, tilt, and turn your bottle to search for all the hidden treasures inside.
34. The Weekend Cabin Plaid Collection

Plaid is a timeless pattern that always feels like home. This collection gives the classic design a fresh, modern update with clean lines and contemporary color palettes. A bold black-and-white windowpane check feels graphic and sharp. A softer version with grey and dusty rose is gentle and chic.
Draped over a simple wooden ladder, they become a part of the room’s decor. The brushed fabric looks incredibly soft, and a thick, plush fringe adds a satisfying weight and texture. These are the throws you want for a stylish, relaxing weekend.
DIY Plaid Fabric-Covered Magnets
You can decorate your fridge with these easy, stylish magnets.
What You’ll Need:
- A few scraps of plaid fleece or cotton fabric
- Large, flat glass gems (the kind you find in the floral section of a craft store)
- Small, strong magnets
- Strong craft glue (like E6000 or a hot glue gun)
- A pencil
- Scissors
Step-by-Step Instructions:
- Trace Your Shape: Place a glass gem on top of your plaid fabric. Use a pencil to trace around it.
- Cut the Fabric: Cut out the circle of fabric, cutting just slightly inside the line you drew.
- Glue the Gem: Put a small dot of glue on the flat back of the glass gem. Press the plaid fabric circle onto the glue, with the pretty side of the fabric facing the flat part of the gem. You should be able to see the pattern through the glass.
- Add the Magnet: Let the first bit of glue dry. Then, put a dot of glue in the center of the fabric on the back and press your magnet onto it.
- Let It Dry: Let your magnet dry completely before you use it to hang up your favorite pictures on the fridge!
35. The Gatsby Art Deco Throw

This throw is a piece of pure glamour. The bold, repeating fan pattern is a hallmark of the Art Deco style, instantly bringing a feeling of 1920s opulence and sophistication to a room. A rich, emerald green pops against a black background, with shimmering gold threads outlining the design.
The woven texture gives the blanket a substantial, high-quality feel. Small, elegant tassels on the corners are the finishing touch. This is a statement piece, a blanket that transforms a bed or sofa into a work of art.
DIY Art Deco Sharpie Mug
You can add some of this geometric glamour to a plain mug.
What You’ll Need:
- A plain white ceramic mug
- An oil-based Sharpie paint pen (a gold one would look great!)
- An oven (you’ll need a grown-up for this part)
Step-by-Step Instructions:
- Clean Your Mug: Wash and dry your mug completely. Make sure there are no smudges or fingerprints on the outside.
- Draw Your Design: Use your paint pen to draw an Art Deco-inspired design. Think straight lines, repeating angles, sunbursts, and geometric fans. You can draw a few simple, repeating fan shapes like the ones on the blanket.
- Let it Dry: Let your drawing air dry for at least a few hours. This helps the design set before you bake it.
- Bake It: This is the grown-up step! Place the mug in a cool oven. Turn the oven on to 350°F (175°C). Let the mug heat up with the oven and bake for 30 minutes.
- Cool Down: Turn the oven off and let the mug cool down completely inside the oven. This prevents it from cracking. Once it’s cool, your design will be permanent! It’s best to hand-wash your creation.
36. The Cloud Gauze Muslin Blankets

These blankets are the definition of soft, breathable comfort. Made from multiple layers of cotton gauze, they have a wonderfully crinkled texture that feels light as air against the skin. They are gentle, simple, and get even softer with every wash.
The color palette is inspired by nature—a dusty rose, a soft sage green, a calm sky blue, and a warm, earthy terra-cotta. These are not heavy winter blankets, but versatile layers that are great for any season. They bring a relaxed, lived-in feel to a well-made bed.
DIY Dip-Dyed Cloth Napkins
You can create a beautiful, soft color effect on plain white napkins.
What You’ll Need:
- Plain white cotton or linen napkins
- Fabric dye in a color you love
- A bucket or large bowl
- Salt
- Warm water
- Rubber gloves
Step-by-Step Instructions:
- Get Your Dye Ready: Following the instructions on your fabric dye package, mix the dye powder with warm water and salt in your bucket. Stir it well.
- Wet Your Napkins: Get your napkins completely wet with plain water and then squeeze out the extra water. This helps the dye absorb evenly.
- First Dip: Wearing your rubber gloves, hold one of your napkins by the corner. Dip the bottom third of it into the dye bath. Hold it there for about a minute.
- Second Dip: Pull the napkin out a little so only the very bottom third is still in the dye. Hold it there for another two or three minutes. This will make the bottom darker than the middle.
- Rinse and Dry: Carefully take your napkin out of the dye. Rinse it under cool water until the water runs clear. Hang it up to dry. The colors will look lighter when they are dry.
37. The Modern Hearth Log Cabin Quilt

This quilt takes a traditional pattern and gives it a striking, modern voice. The “Log Cabin” design, built from the center out, is rendered in bold strips of black, white, and textured grey fabric. The high contrast creates a hypnotic, graphic effect.
Right in the very middle is the “hearth”—a surprising and vibrant pop of bright red and yellow. It’s the warm heart of the cool, geometric design. This is a piece of textile art, a blanket that is clean, powerful, and full of visual impact.
DIY Paper Log Cabin Square
You can build this classic quilt pattern using just paper and glue.
What You’ll Need:
- A piece of white paper for your base (about 6×6 inches)
- A small square of red paper (about 1×1 inch)
- Strips of paper in different colors (like black, grey, and white), about half an inch wide
- A glue stick
- Scissors
Step-by-Step Instructions:
- Start the Hearth: Glue your small red square right into the center of your white paper base. This is the start of your log cabin.
- Add the First “Log”: Take a strip of another color, like white. Place it next to your red square and cut it so it’s the same length. Glue it down.
- Add the Second Log: Take another white strip. Place it along the top of your red square and the first white log. Cut it to fit that combined length, and glue it down.
- Keep Building: Now, take a different color, like a black strip. Place it along the side of your growing square, cut it to fit, and glue it down. Then take another black strip and do the same for the bottom.
- Go Around and Around: Keep adding “logs” of paper, going around and around your center square. You can alternate colors (two white sides, then two black sides, then two grey sides). Keep going until your whole base is covered. You’ve made a log cabin block!
38. The Candy-Colored Mohair Plaid

This throw is a cheerful dream of color and fuzz. The soft, hazy texture of mohair gives the whole blanket a gentle glow. A bold plaid pattern is created with wide stripes of bright, happy colors—mint green, lavender, hot pink, and sunny orange.
It’s a blanket that feels both incredibly soft and wonderfully energetic. A long, multi-colored fringe adds to its playful personality. This is the throw you grab when you want to wrap yourself in something that feels like a warm, colorful hug.
DIY Woven Paper Plate Dream Catcher
Weave a colorful web and add some cheerful decorations.
What You’ll Need:
- A sturdy paper plate
- A hole punch
- Yarn in lots of bright colors
- Scissors
- Optional: Beads, feathers
Step-by-Step Instructions:
- Prepare the Plate: Cut out the flat center circle of the paper plate, leaving just the rim. Use your hole punch to make an odd number of holes all around the inside of the rim.
- Start Your Web: Cut a very long piece of yarn. Tie one end to one of the holes.
- Weave Across: Start weaving your yarn back and forth across the circle, threading it through the different holes in a random pattern. Go back and forth until you have a cool-looking web. Tie off the end.
- Add Dangly Bits: Cut a few new pieces of yarn, about a foot long each. Tie them to the bottom of your paper plate rim.
- Decorate: If you have beads, you can thread them onto these dangling pieces of yarn and tie a knot at the bottom so they don’t fall off. You can also tie on a few feathers. Hang it up and enjoy your colorful creation!
39. The Wildflower Meadow Embroidered Throw

This throw is a piece of delicate, understated artistry. Upon a canvas of natural, light-colored linen, fine embroidery depicts a scattering of wild botanicals. You can see the gentle fronds of a fern, delicate wildflowers, and sprigs of herbs.
The embroidery is minimalist and clean, adding a touch of nature without overwhelming the simple beauty of the fabric. A thin black piped edge provides a clean, finished frame. This is a blanket for someone who appreciates quiet beauty and the craft of handwork.
DIY Leaf Rubbing Greeting Card
You can capture the delicate patterns of nature with this simple art project.
What You’ll Need:
- An interesting leaf with lots of veins
- A piece of plain white paper
- A crayon with the paper wrapper peeled off
- A piece of folded cardstock
Step-by-Step Instructions:
- Find a Good Leaf: Go outside and find a leaf that isn’t too dry or crumbly. The best ones have strong veins that you can feel with your fingers.
- Place the Leaf: Put your leaf on a hard, flat surface. Place your plain white paper on top of it.
- Hold It Still: Use one hand to hold the paper firmly in place so it can’t slide around.
- Rub with the Crayon: Take your unwrapped crayon and lay it on its side. Gently rub the crayon back and forth over the paper where the leaf is underneath.
- Watch the Pattern Appear: Like magic, the detailed shape and veins of the leaf will appear on your paper!
- Make Your Card: Cut out your leaf rubbing and glue it to the front of a folded piece of cardstock to create a beautiful, nature-inspired greeting card.
40. The Reversible Cable-Knit & Sherpa Throw

This throw offers two kinds of classic comfort in one beautiful package. One side features the timeless, chunky texture of a cream-colored cable-knit sweater. It’s a look that is traditional, cozy, and always in style.
Flip it over to find an irresistibly soft and plush grey sherpa fleece. It provides a different kind of warmth that is dense and fleecy. This blanket truly gives you the best of both worlds: the handsome look of a classic knit and the unbeatable softness of modern fleece.
DIY Textured Collage Art
Explore different feelings and textures by creating a collage.
What You’ll Need:
- A piece of stiff paper or cardboard
- A glue stick
- Scissors
- A collection of different textured materials: a piece of yarn, a cotton ball, a small square of sandpaper, a piece of tin foil, a scrap of soft fabric (like fleece).
Step-by-Step Instructions:
- Gather Your Textures: Find a few small items around your house that feel interesting to touch. Look for things that are soft, bumpy, smooth, or rough.
- Cut Your Shapes: You can cut your texture materials into different shapes—squares, circles, or wavy lines.
- Arrange Your Collage: Before you glue anything down, arrange your different textured pieces on your paper. Move them around until you like how they look together.
- Glue It Down: One by one, pick up your pieces, put glue on the back, and stick them onto your paper.
- Feel Your Art: Once the glue is dry, you can run your fingers over your collage. Notice how the different parts feel. You’ve created a piece of art that you can see and touch!
As we’ve seen through these 40 examples, the world of cozy throws and blankets is vast and varied. There is a style for every mood and every home, from the boldly patterned to the quietly minimalist. Finding the right one is about choosing what feels most like a warm embrace to you.
Adding that perfect layer is the first step. The next is making the space truly your own. The simple act of creating something with your hands, whether it’s a small coaster or a funky pom-pom, infuses your home with a unique warmth that cannot be bought.
We hope this journey has sparked ideas and inspired you to look at your spaces with fresh eyes. This winter, embrace the quiet joy of staying in, get comfortable, and let your creativity add to the warmth.
Key Takeaways
- Think About Material: The feel of a blanket is everything. Choose breathable cottons like muslin for lighter layering, or opt for wool, sherpa, and fleece for serious insulation against the cold.
- A Throw is an Accessory: Use your throw blanket to tie a room together. Pick a colour from your curtains, cushions, or artwork to create a cohesive and professionally styled look.
- Drape with Purpose: How you place your blanket matters. A neat, crisp fold looks tailored and modern, while a casual toss over the arm of a sofa feels relaxed and inviting.
- Don’t Underestimate DIY: Starting a small, simple craft project is a rewarding way to spend a quiet afternoon. It adds a personal story to your decor and makes your home feel more connected to you.